Sony Mavica Photo Dump
How many images can you squeeze into 1.44MB?
 Photography Photography |
July 7, 2024 |
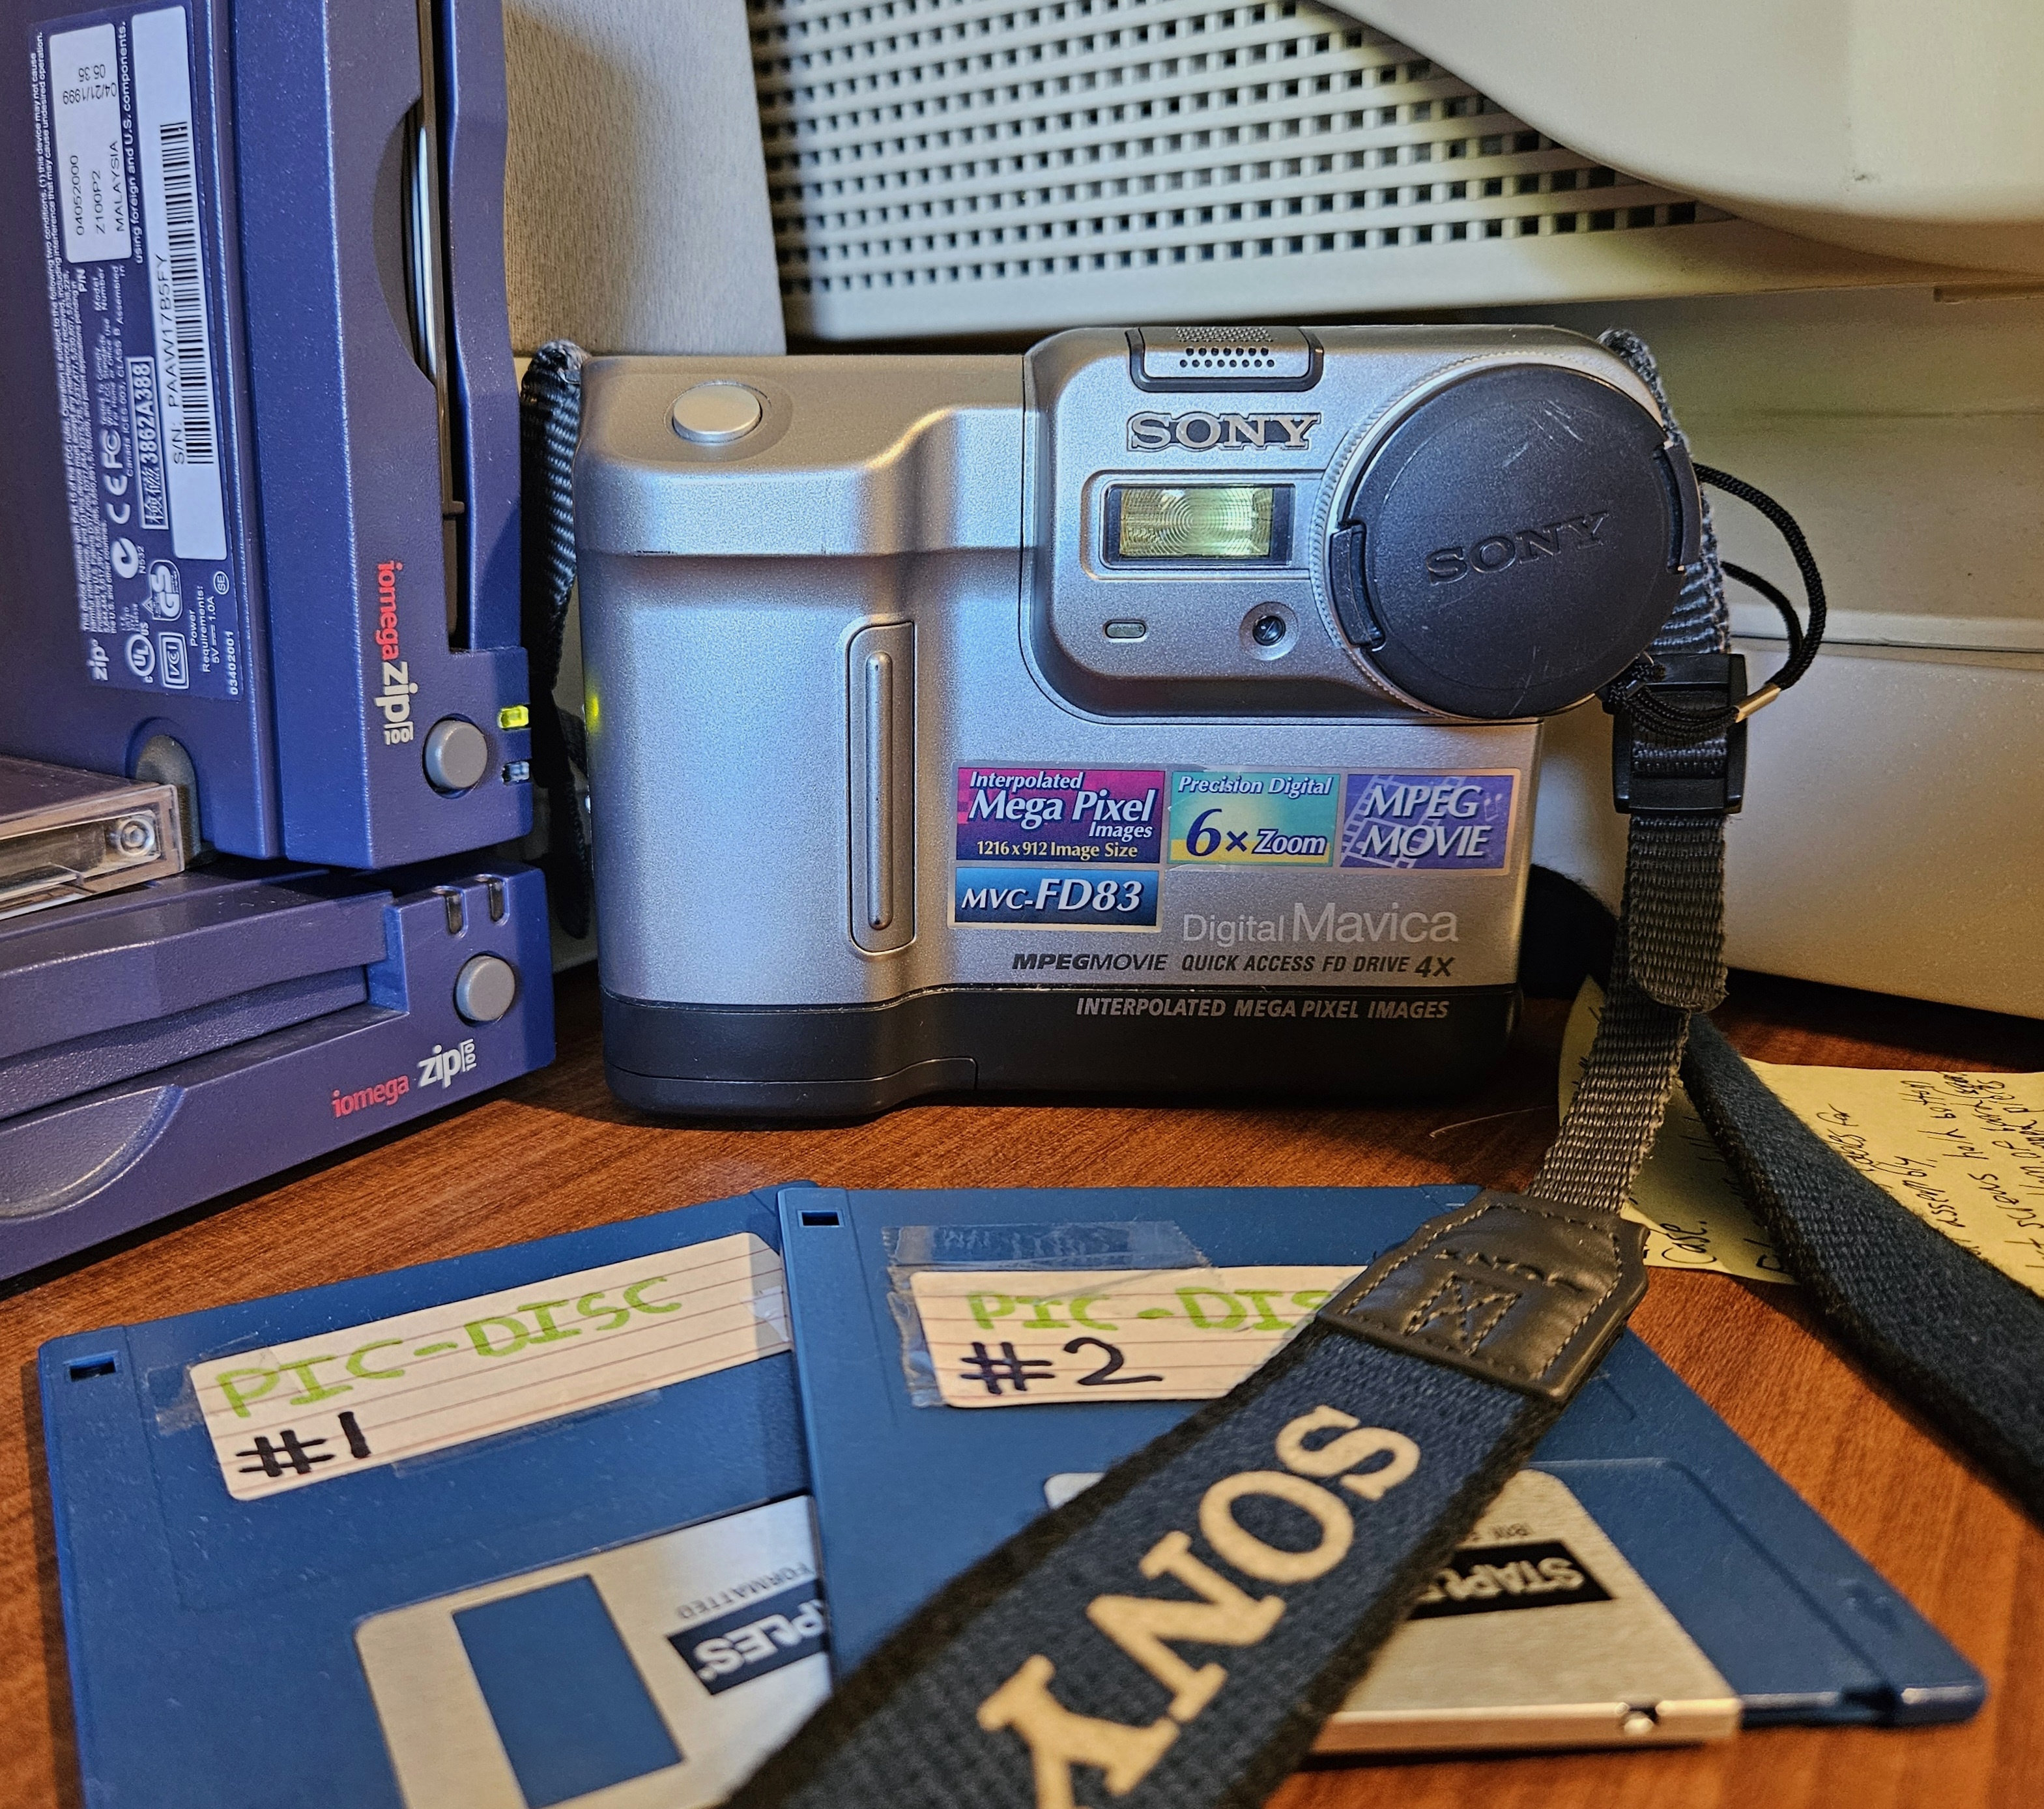
Today I'd like to talk about my Sony Mavica, which is a digital camera from 1999 that uses floppy disks as the storage media. My model in particular is an MVC-FD83. If you don't care about the gory details and you just want to see the pics, click here.
Most other digital cameras this time period used flash storage such as compact flash or Toshiba's SmartMedia memory card. All of these options had capacities that were much larger than a 1.44MB floppy disk, with compact flash potentially reaching up to 256MB in size. The only reason I assume Sony would be batshit crazy enough to use such a microscopic storage capacity is because floppy disks were more common to find in most standard PC's of the era. This meant that you likely wouldn't need to get some kind of external reader to transfer your photos to your PC like you would with something like compact flash.
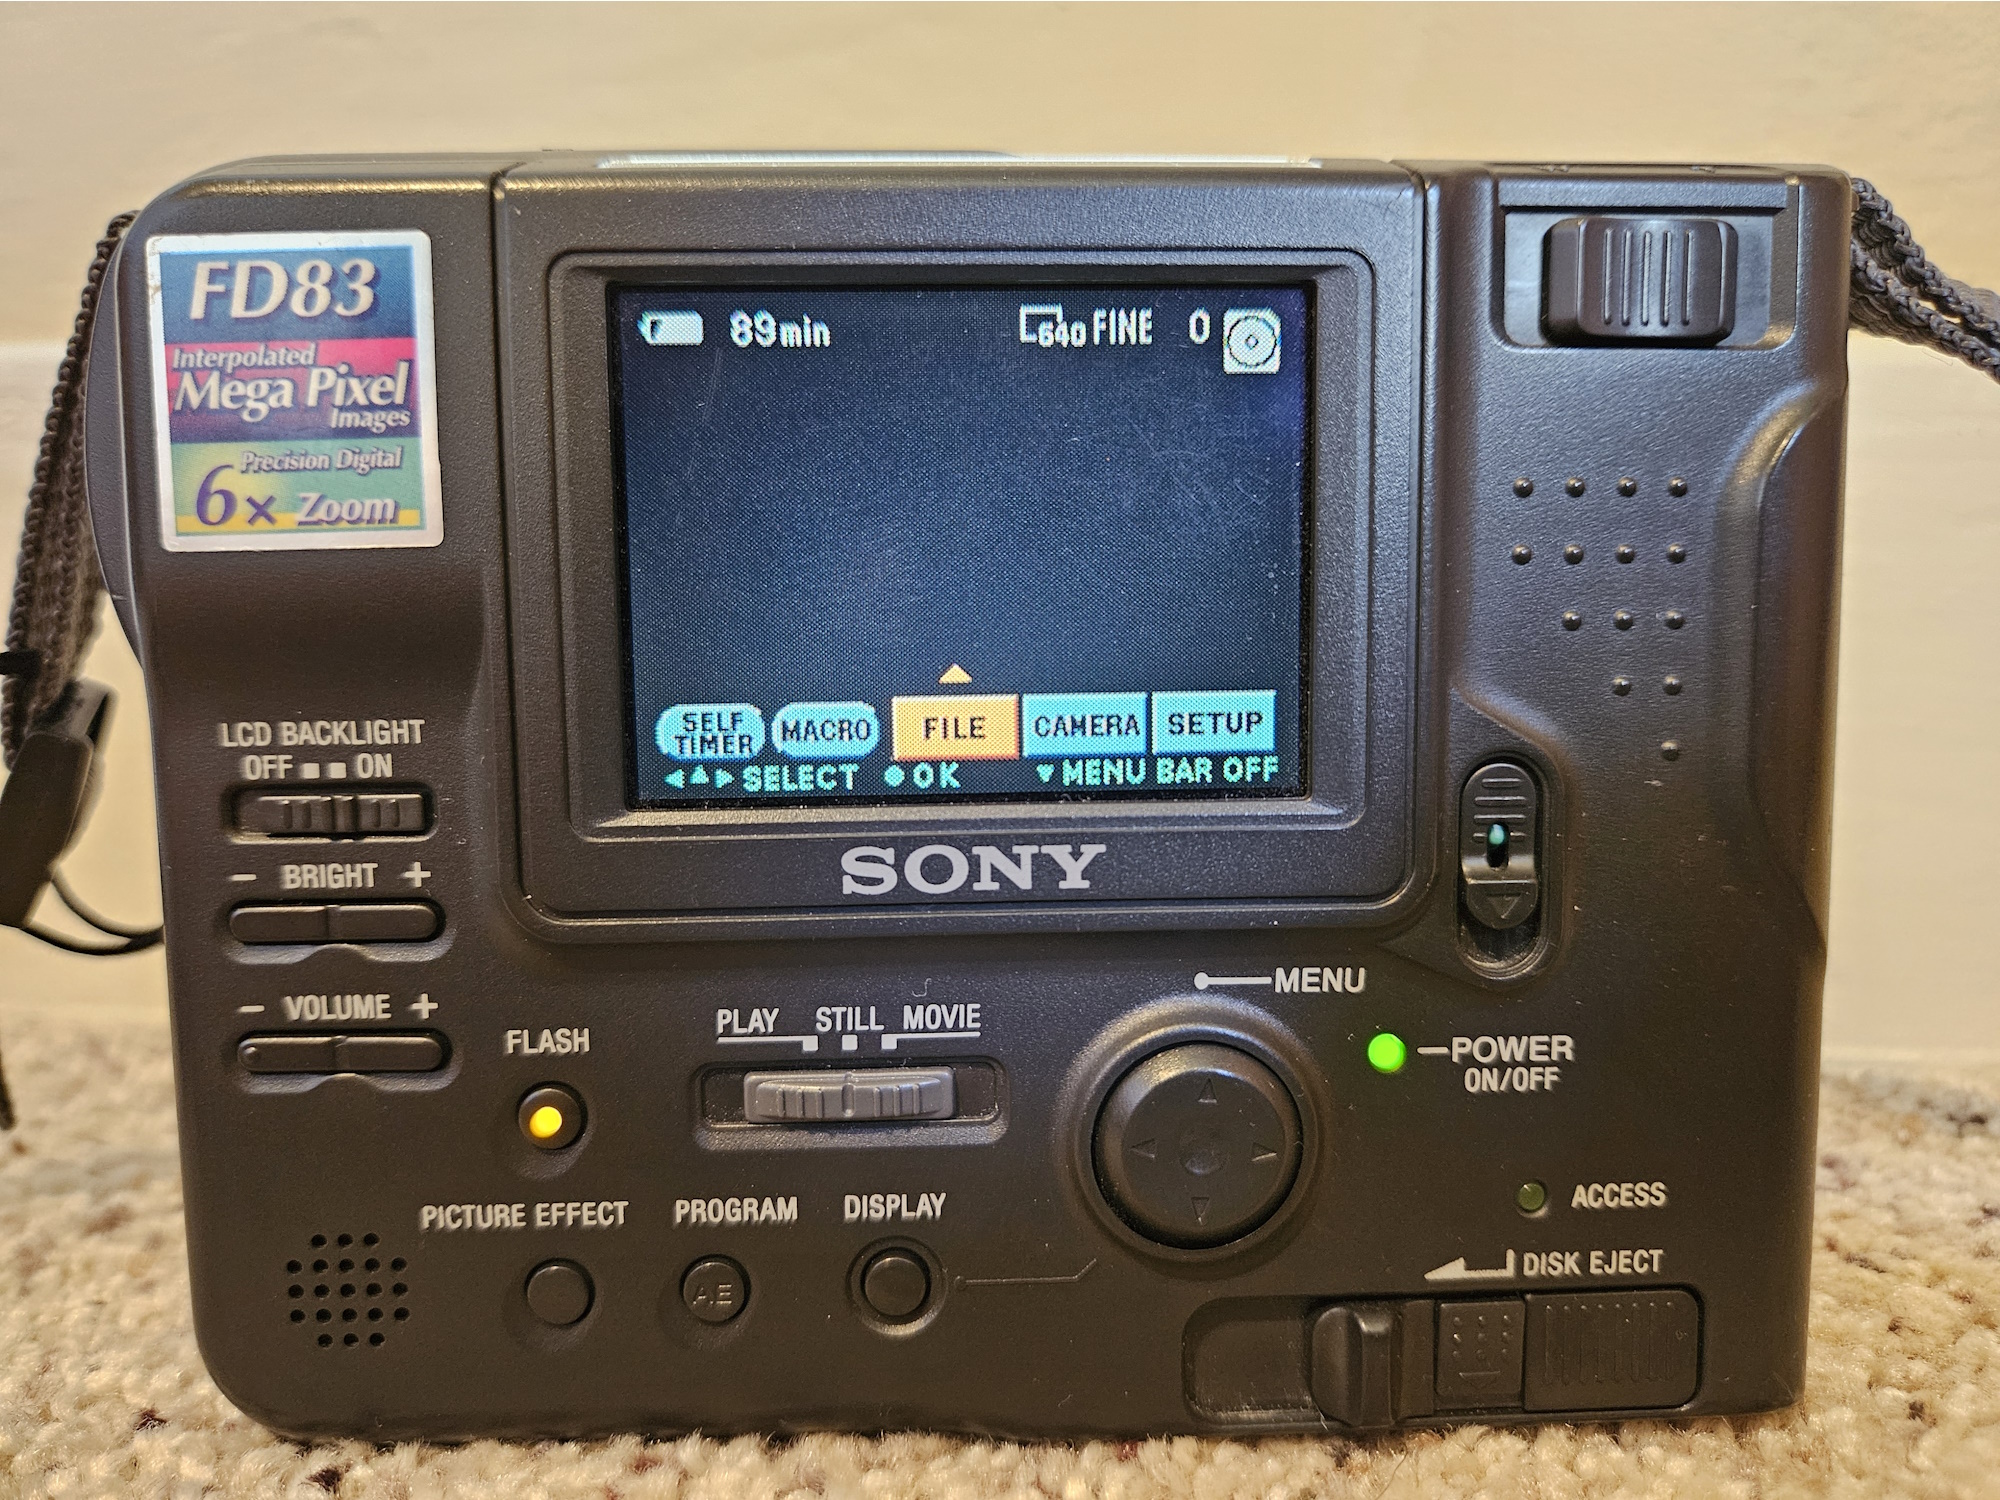
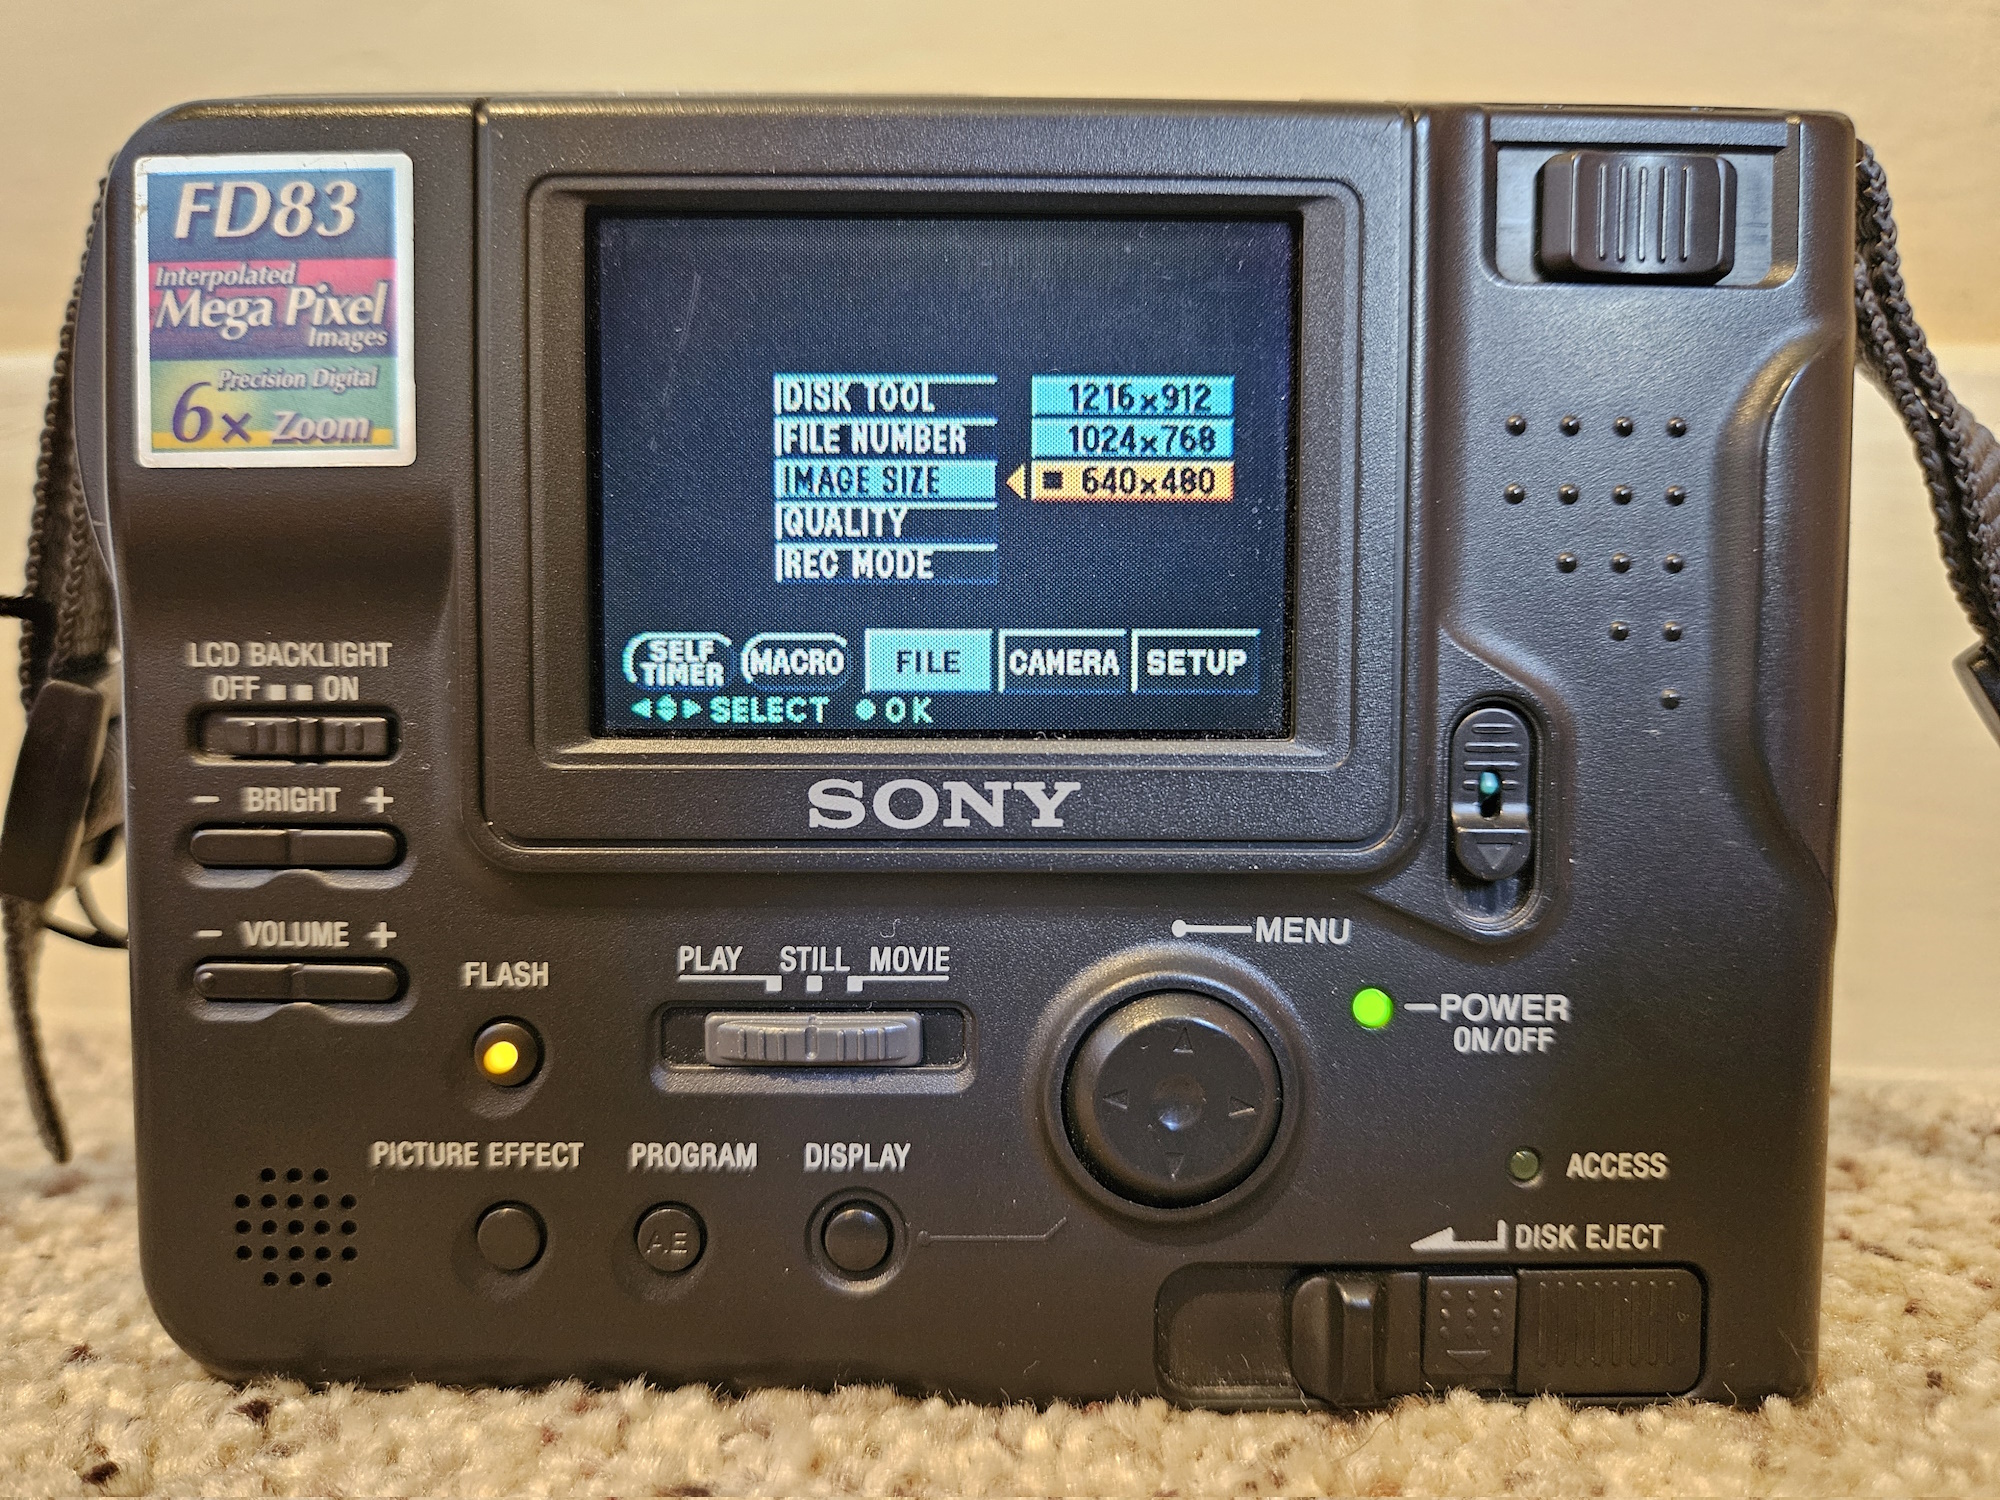
This is the interface for the MVC-FD83. You've got a screen which shows a choppy live view of what the camera sees, with a pleasantly straight-forward UI which I'll get to in a moment. The power switch is on the right of the screen, which you pull downwards to turn on the camera. After pulling it, it springs back up to its original position. Above that is the zoom slider. You shift the slider left to zoom out, or right to zoom in. The slider springs back to the center once let go. The disk eject, located below the power switch, has a self-protective measure to prevent you from ejecting the disk accidentally. You pull that separated portion down to "unlock" the lever, then you slide to the left while still holding the "lock" down to pop the disk out. The access light will indicate when the disk is being accessed.
Below the screen you have the menu selector. The "still" menu is where you shoot still images (JPG format), the "movie" menu is where you can record video (MPEG format), and the "play" menu is where you can view your images and videos. The circular menu button actually tilts in 4 directions for menu navigation, similar to rocking a D-pad on a game controller. To select something, you click the directional pad in the center (it's pretty satisfying to press).
Also in that central region is the flash toggle button, which is self explanatory. There is also the picture effect button (I'll get to what that does later in the post), the display button that toggles the UI, and the program button. The program button selects between 5 built in auto exposure functions for various situations. According to the manual provided on Sony's website on page 31-GB, here is what these functions are and what they do:
| Function name | Description in manual |
|---|---|
| Low Lux mode 1 | "For making subjects brighter in insufficient light." |
| Low Lux mode 2 | "For recording a dark picture more brightly, or making the movement of the subject brighter seem lively." |
| Sunset & Moon mode | "For recording subjects in dark environments such as sunsets, fireworks, neon signs, or general night views." |
| Landscape mode | "For distant subjects such as mountains behind an obstacle such as a window or screen." |
| Panfocus mode | "For changing the subject to focus on quickly and simply (from close subjects to distant subjects). Or, for recording with flash in a dark place where it is hard to bring the camera into focus." |
I haven't played with any of these functions yet, as I've only just learned about them as I've written this blogpost. I'll definitely have to try them out in the future.
On the left side of the camera are standard self-explantory features which include a toggle for the LCD backlight, brightness buttons for the screen, and volume buttons for video playback.
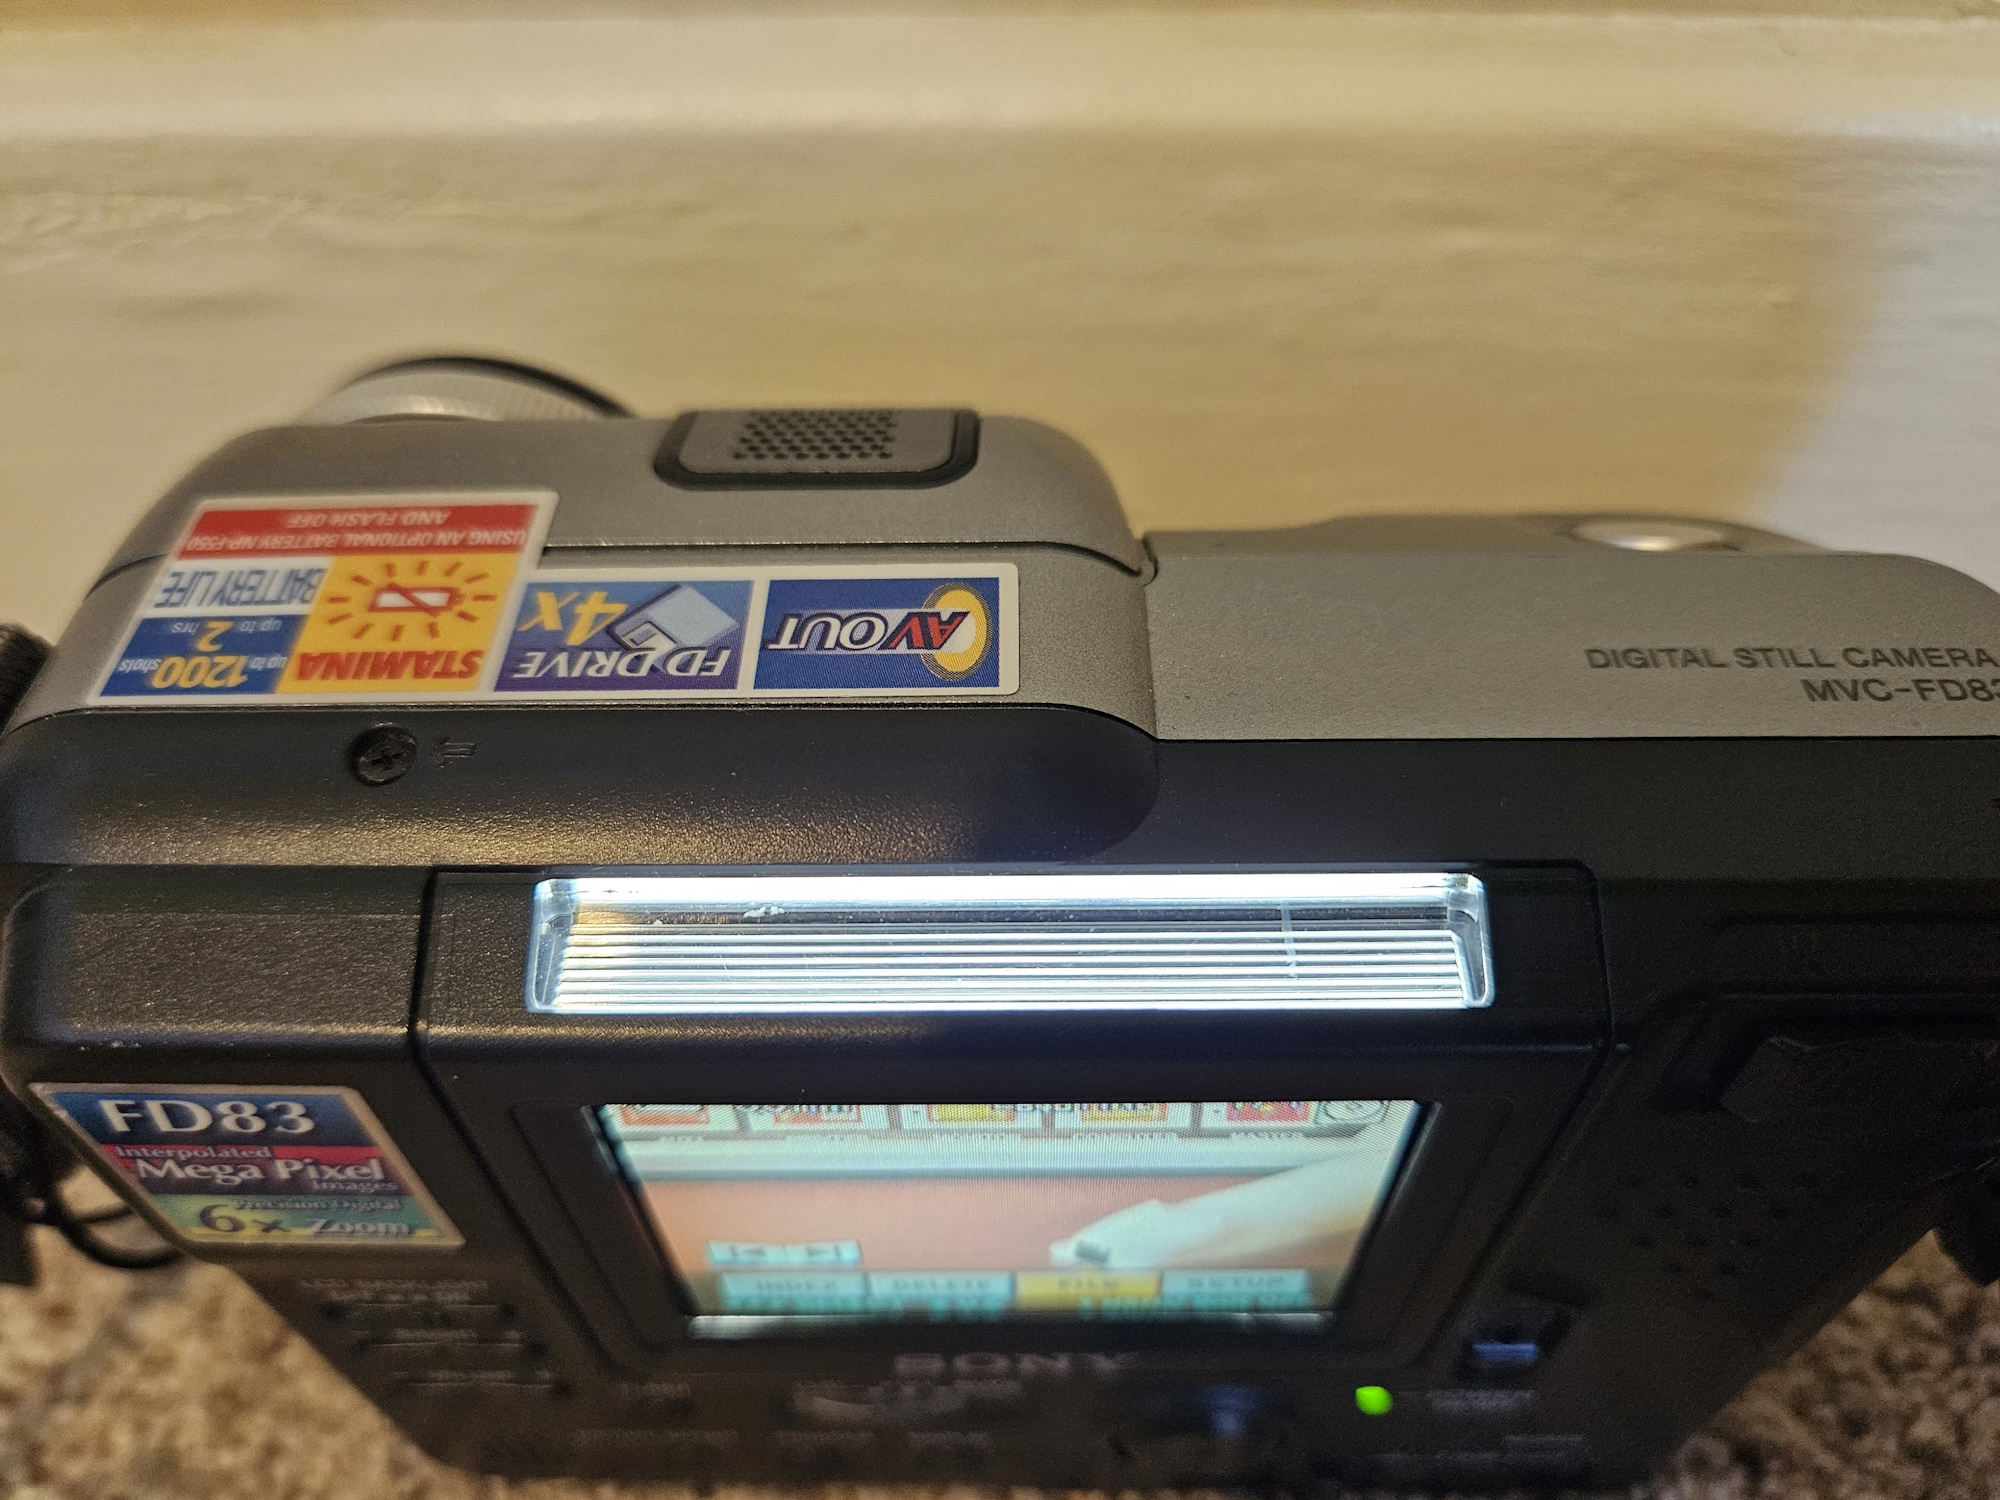
The Mavica's backlight for the screen is interesting in that you can see it through a window on top of the camera. I wasn't sure why this was here at first, but then I realized that you can point a flashlight into the window when the backlight is off, and the flashlight lights up the screen where the light is directed. I believe that this window is intended to allow for sunlight to light up the screen for when the backlight is disabled. One might want to do this in order to lengthen the battery life while using the camera in a brightly light environment. Cool feature, but it's still fairly difficult to see the screen even with the literal sun as the backlight.
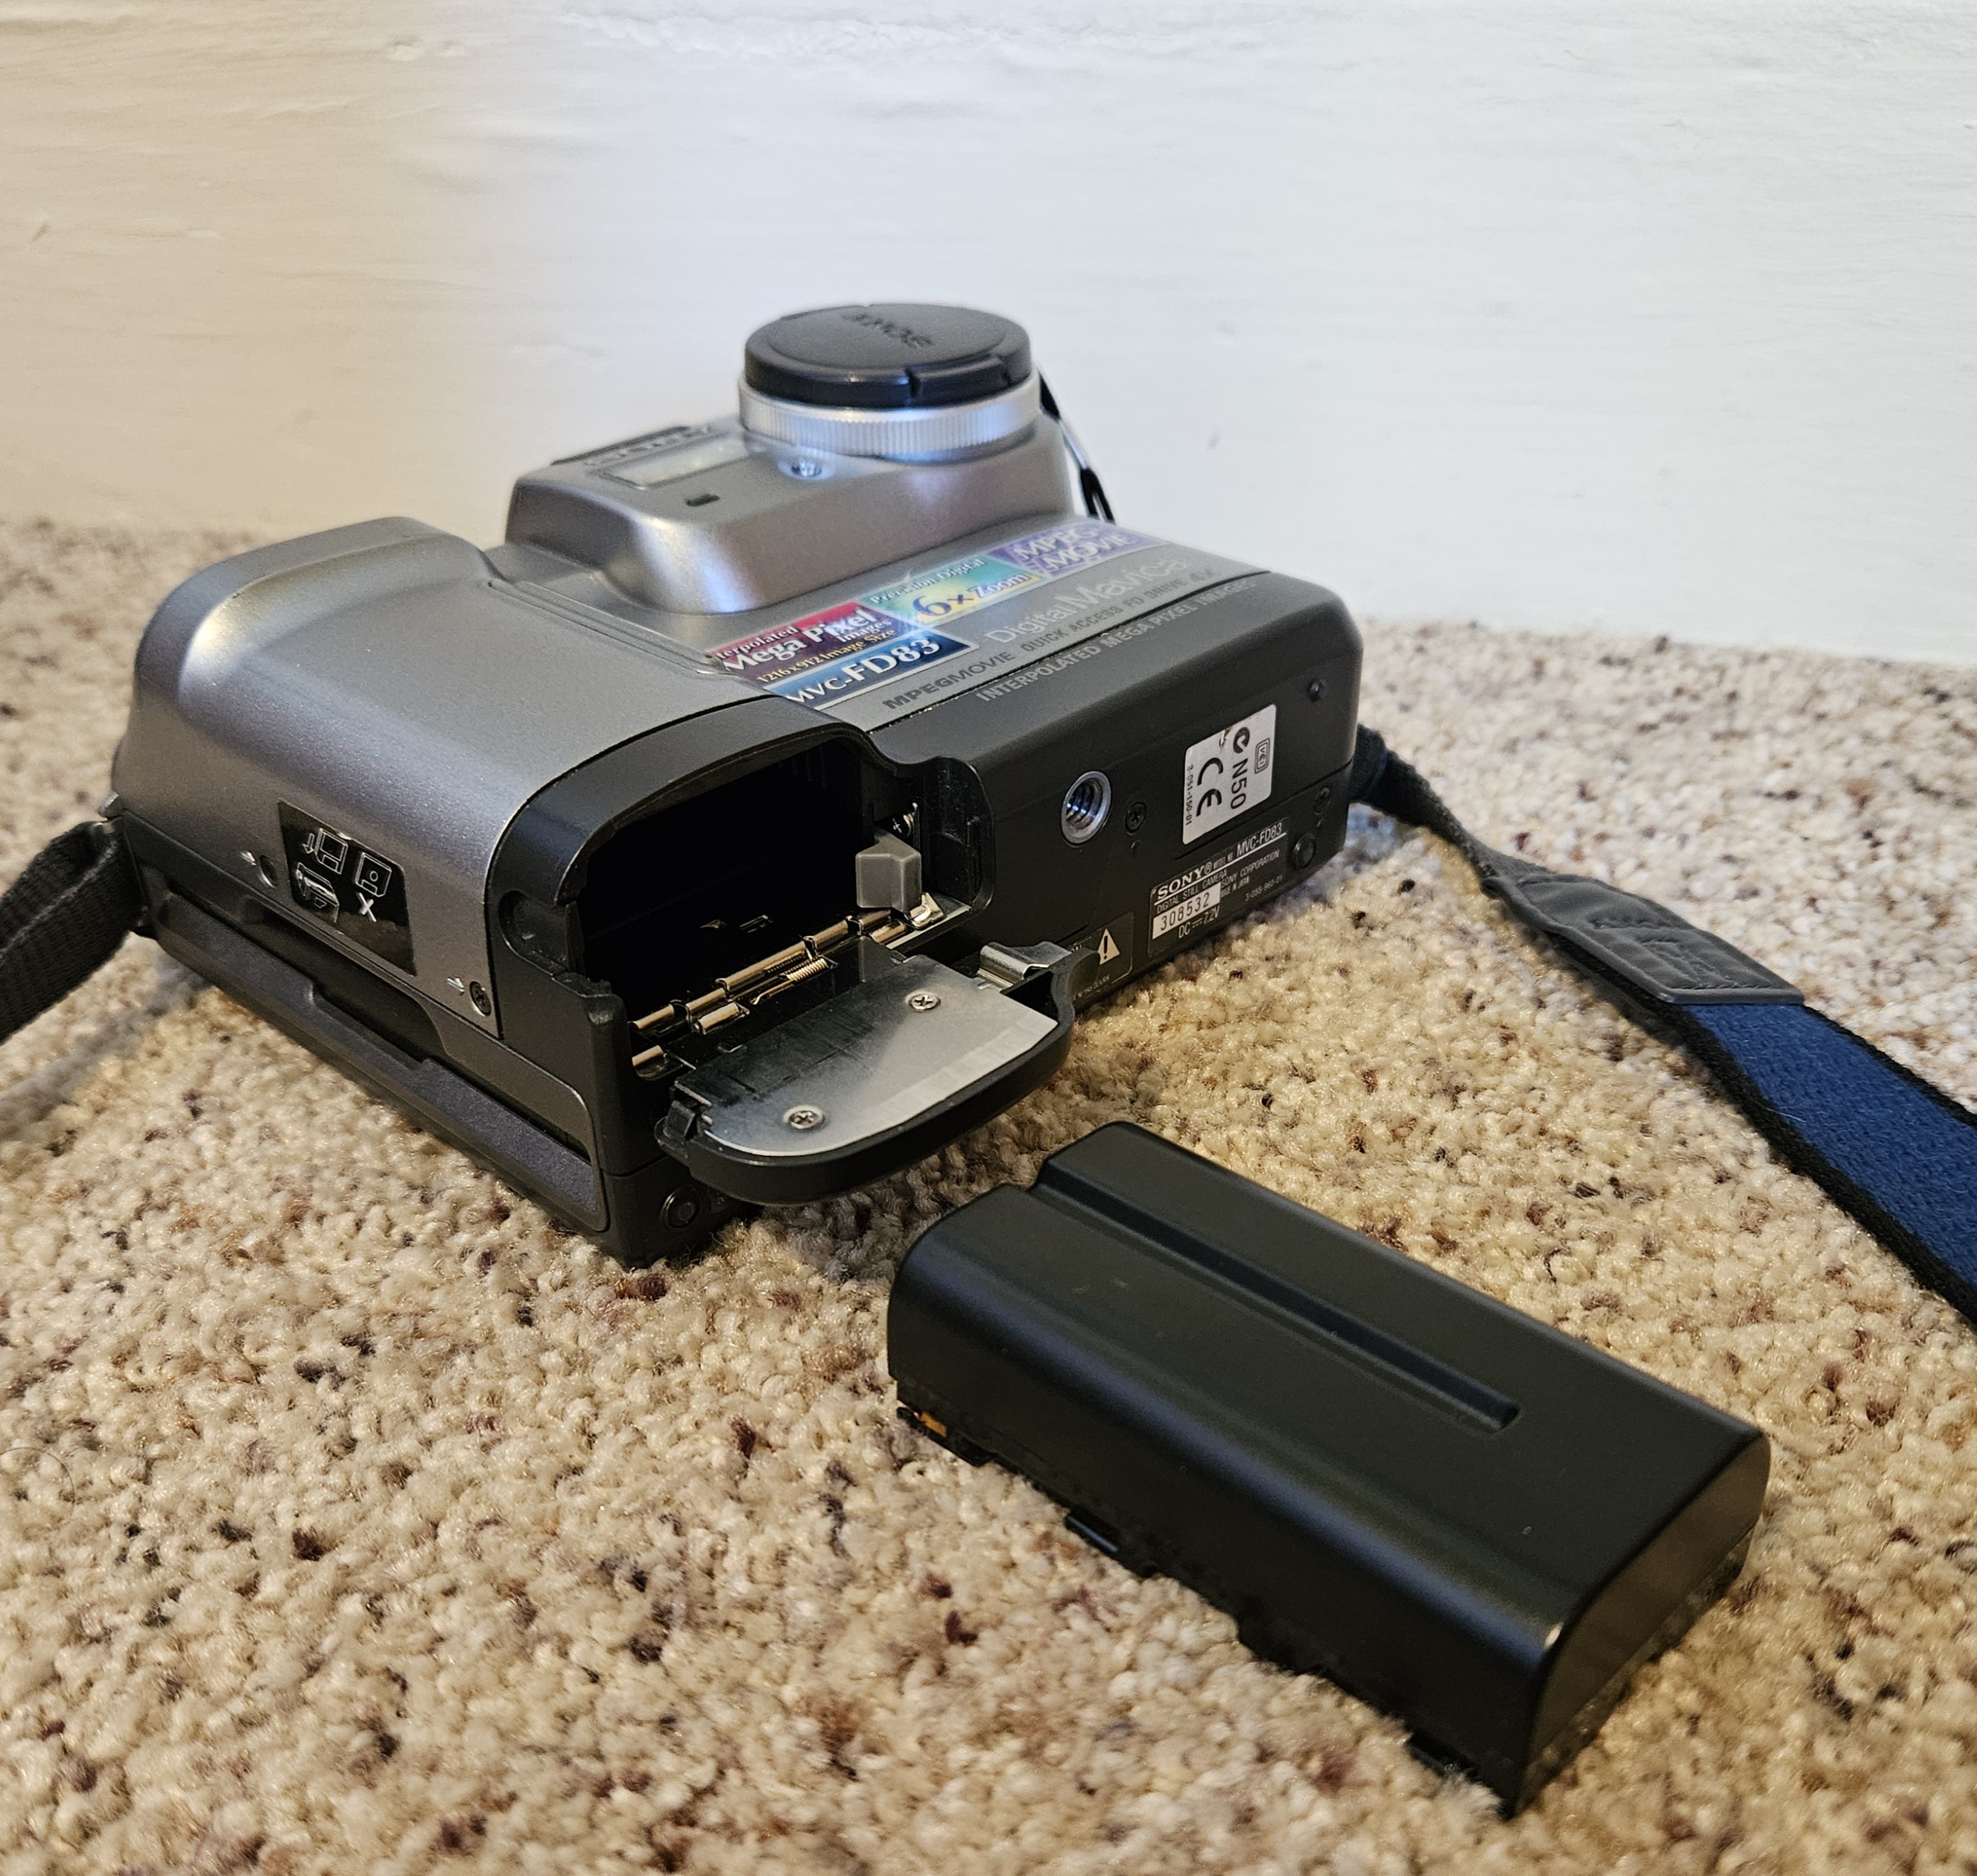
The battery in my camera is not the original battery, but it's probably still an old replacement. My battery is an energizer ER-C520. The factory original battery that would have come with the FD83 is Sony's NP-F330 infolithium battery, with their NP-F550 battery being a higher capacity alternative.
As you might imagine, some compromises must be made in order to fit images and video on a 1.44MB floppy disk. For reference, the single photo of the camera that I used for the title of this post (which I took with my phone) is 2.95MB.
In order to conserve space, it's crucial to determine what resolution you want to take your photos at. This becomes a balancing act of choosing what shots you want to be of the highest quality, and deciding which shots you're fine with being at the lowest quality in order to provide space for higher quality photos or even video.
The average file size for 640 x 480 resolution images in this post is ~86KB. Assuming that every image file was this average size, that would mean that a single 1.44MB floppy can hold up to 17 images. It's like having a small roll of film, but you can determine how many photos fit on the roll.
There are two quality settings which can be selected, and not even the manual really has a clear explanation for how these settings really work beyond it affecting the file size. I'm pretty sure most of my photos were taken with the "standard" quality, but for my higher res photos I switched over to the "fine" quality.
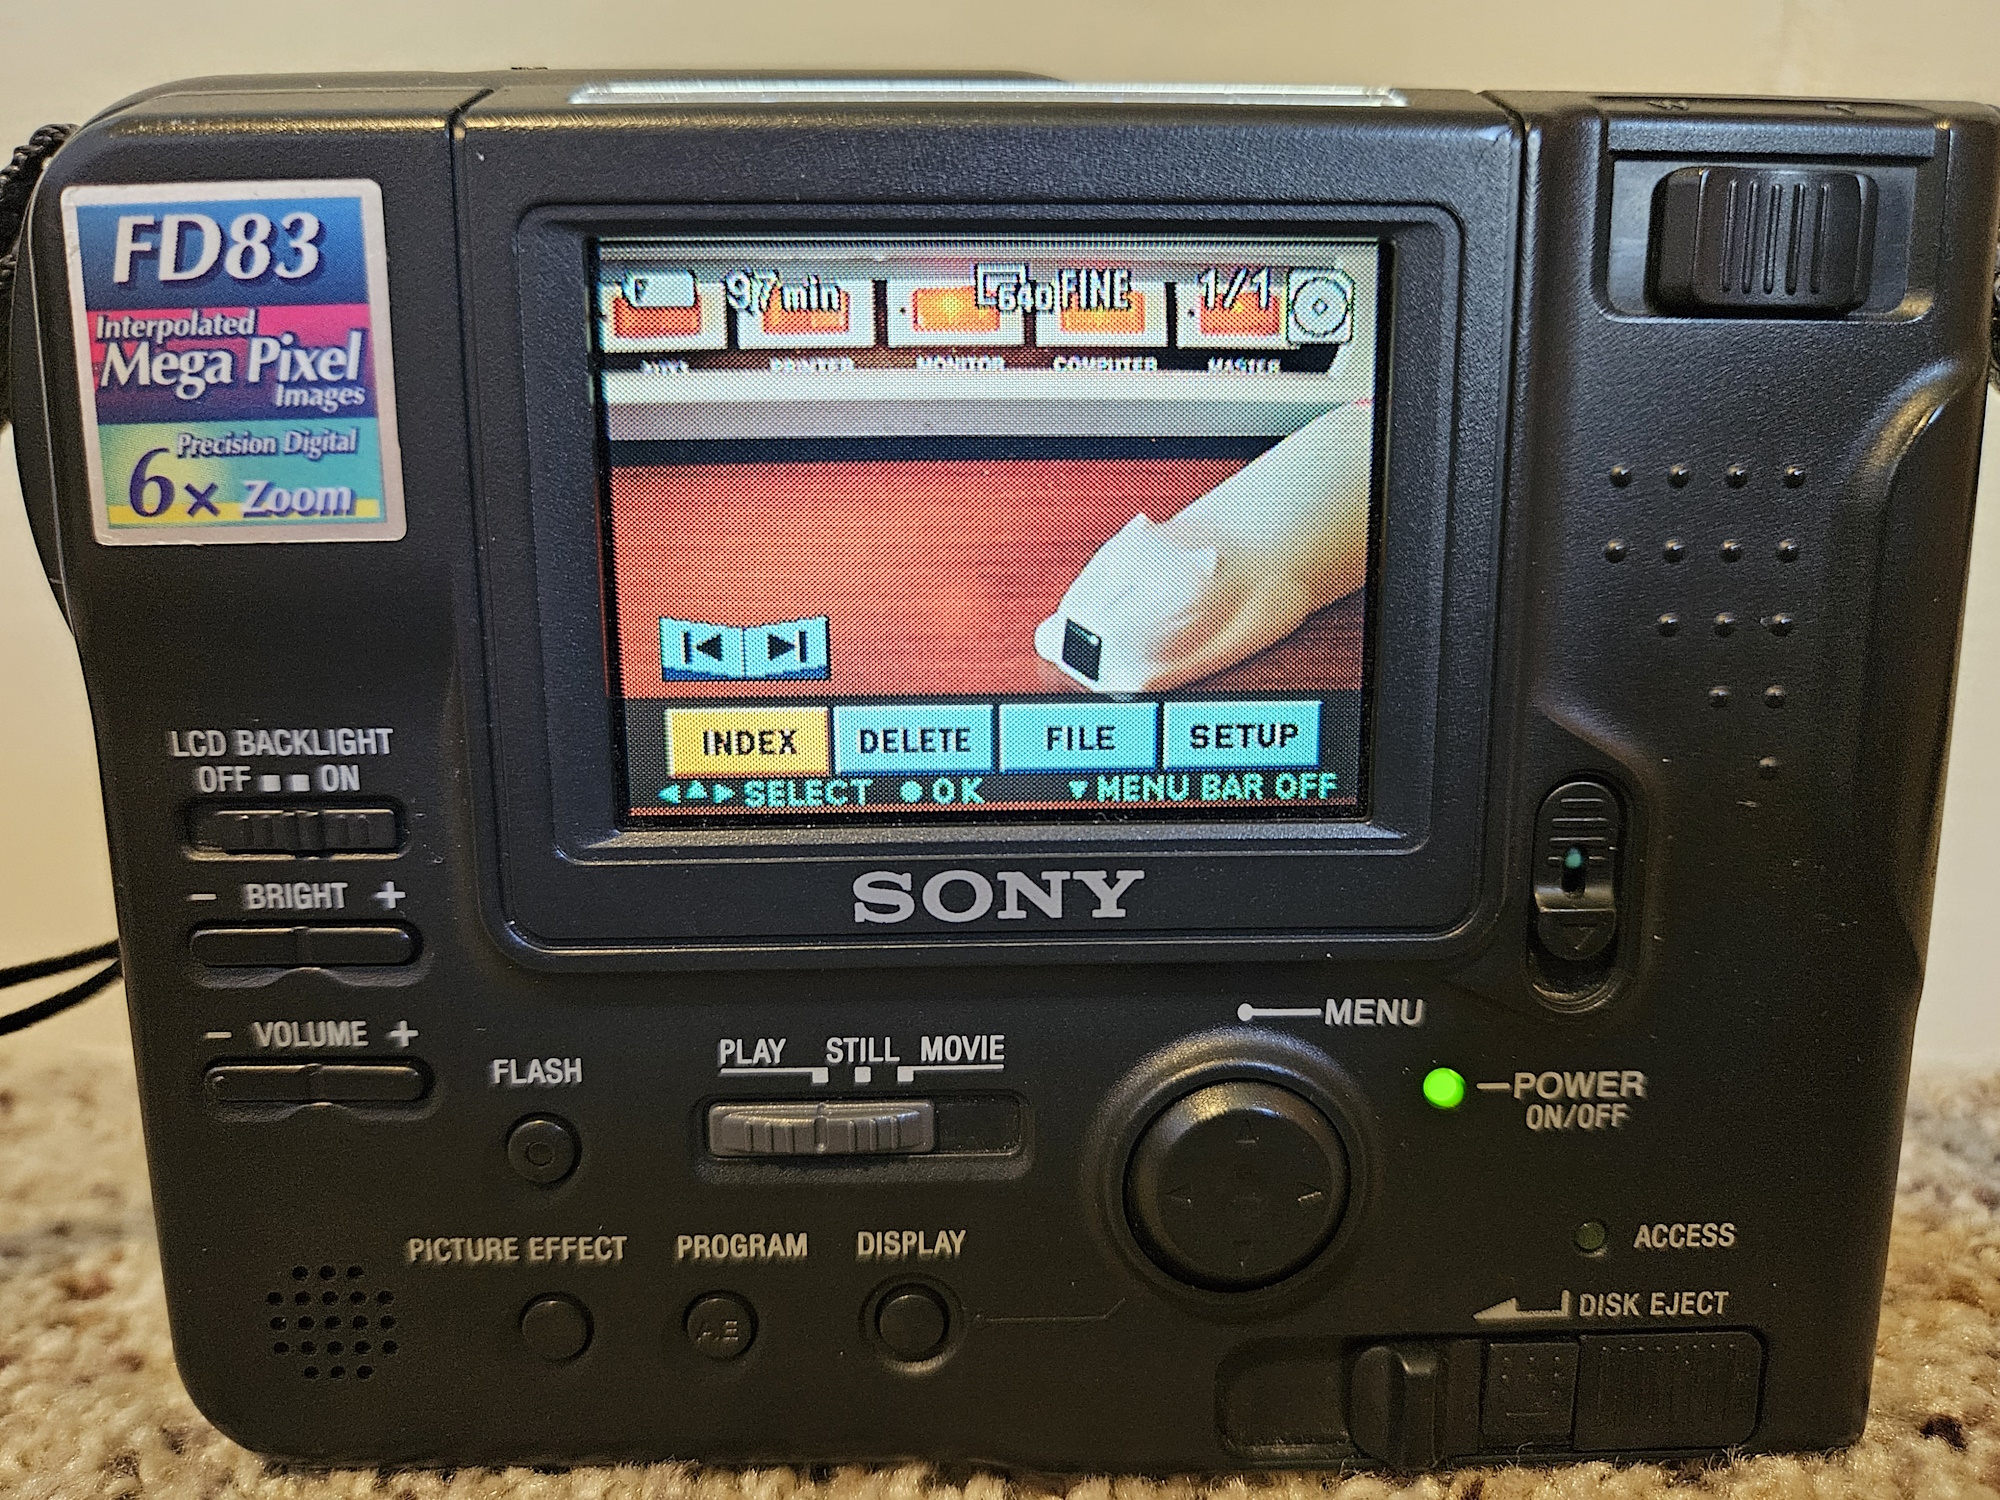
The photo viewing menu is very straight forward to use. The forwards and backwards navigation buttons have this neat rocking animation as you explore your saved images. The index button provides a gallery view of all photos. The delete button... deletes. The file button provides 5 options for a file, which include allowing the user to protect an image from deletion, to give an image a print mark (see DPOF), to copy files to a different disk (it prompts you to swap disks), to run a slideshow with the photos on the disk, and to copy/format the disk with the disk tool option.
Finally, the setup menu allows the user to enable a shutter or beep sound for when photos are taken, change the language between English or Japanese, set the time and date, and choose the video out mode (NTSC or PAL).
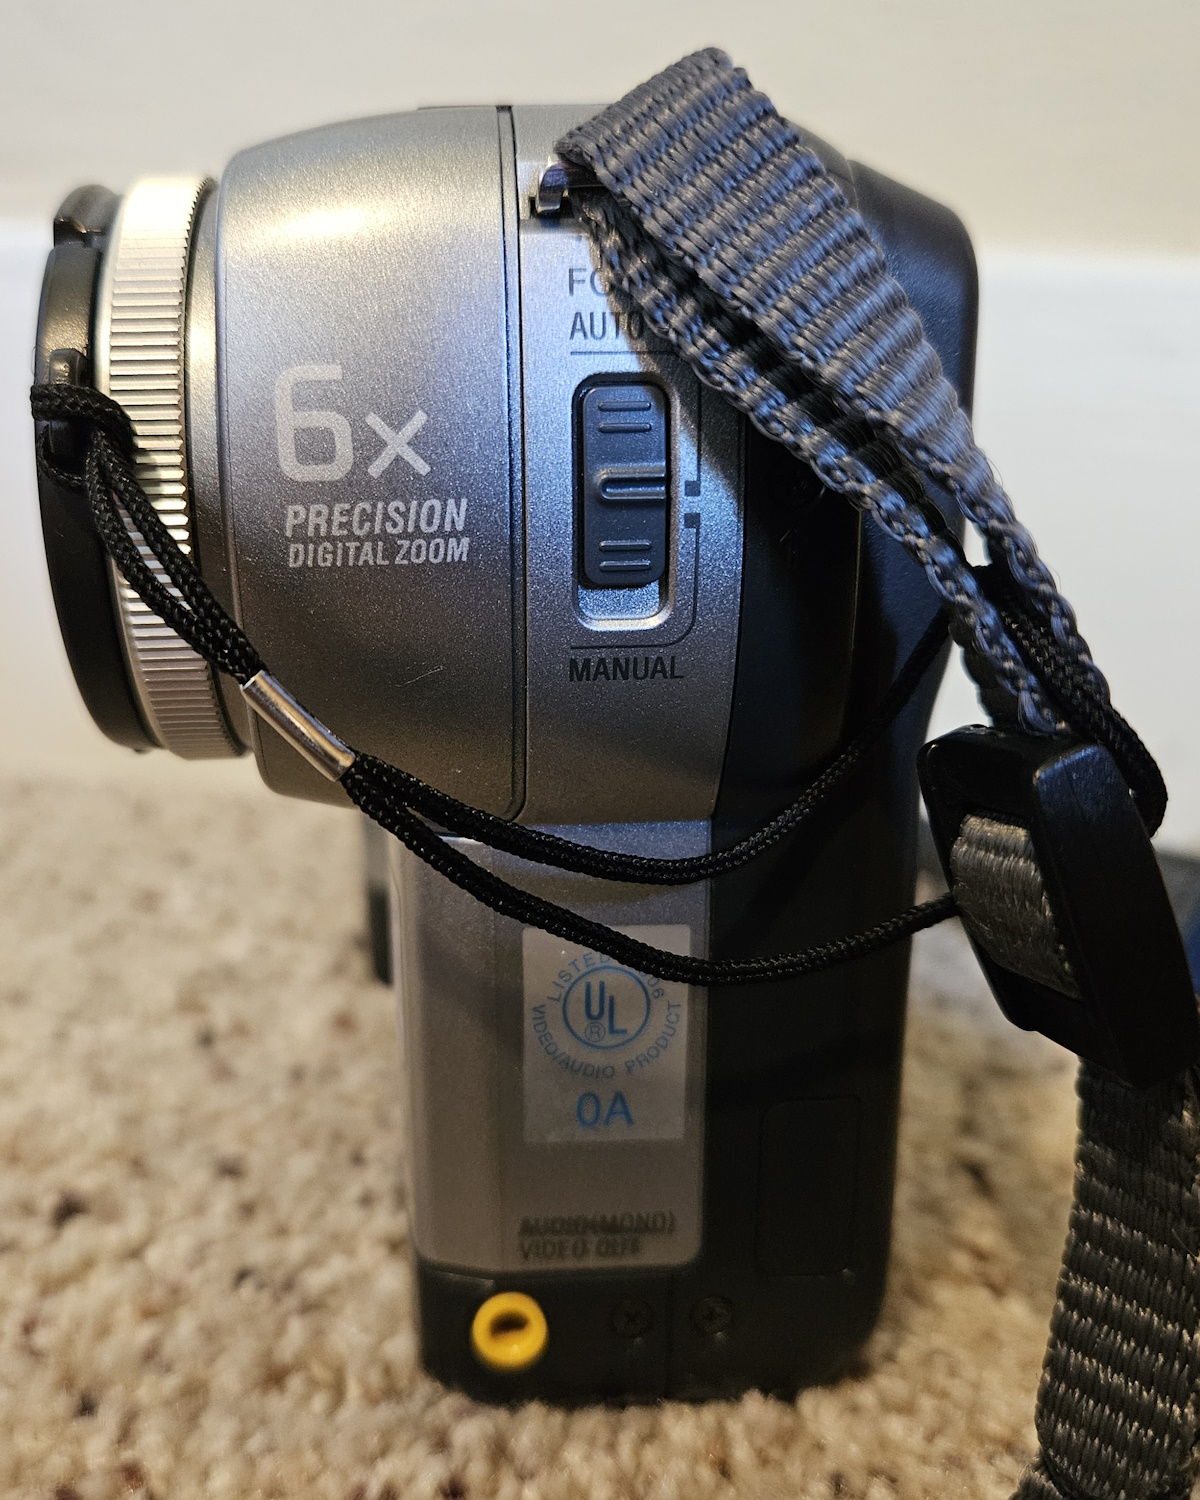
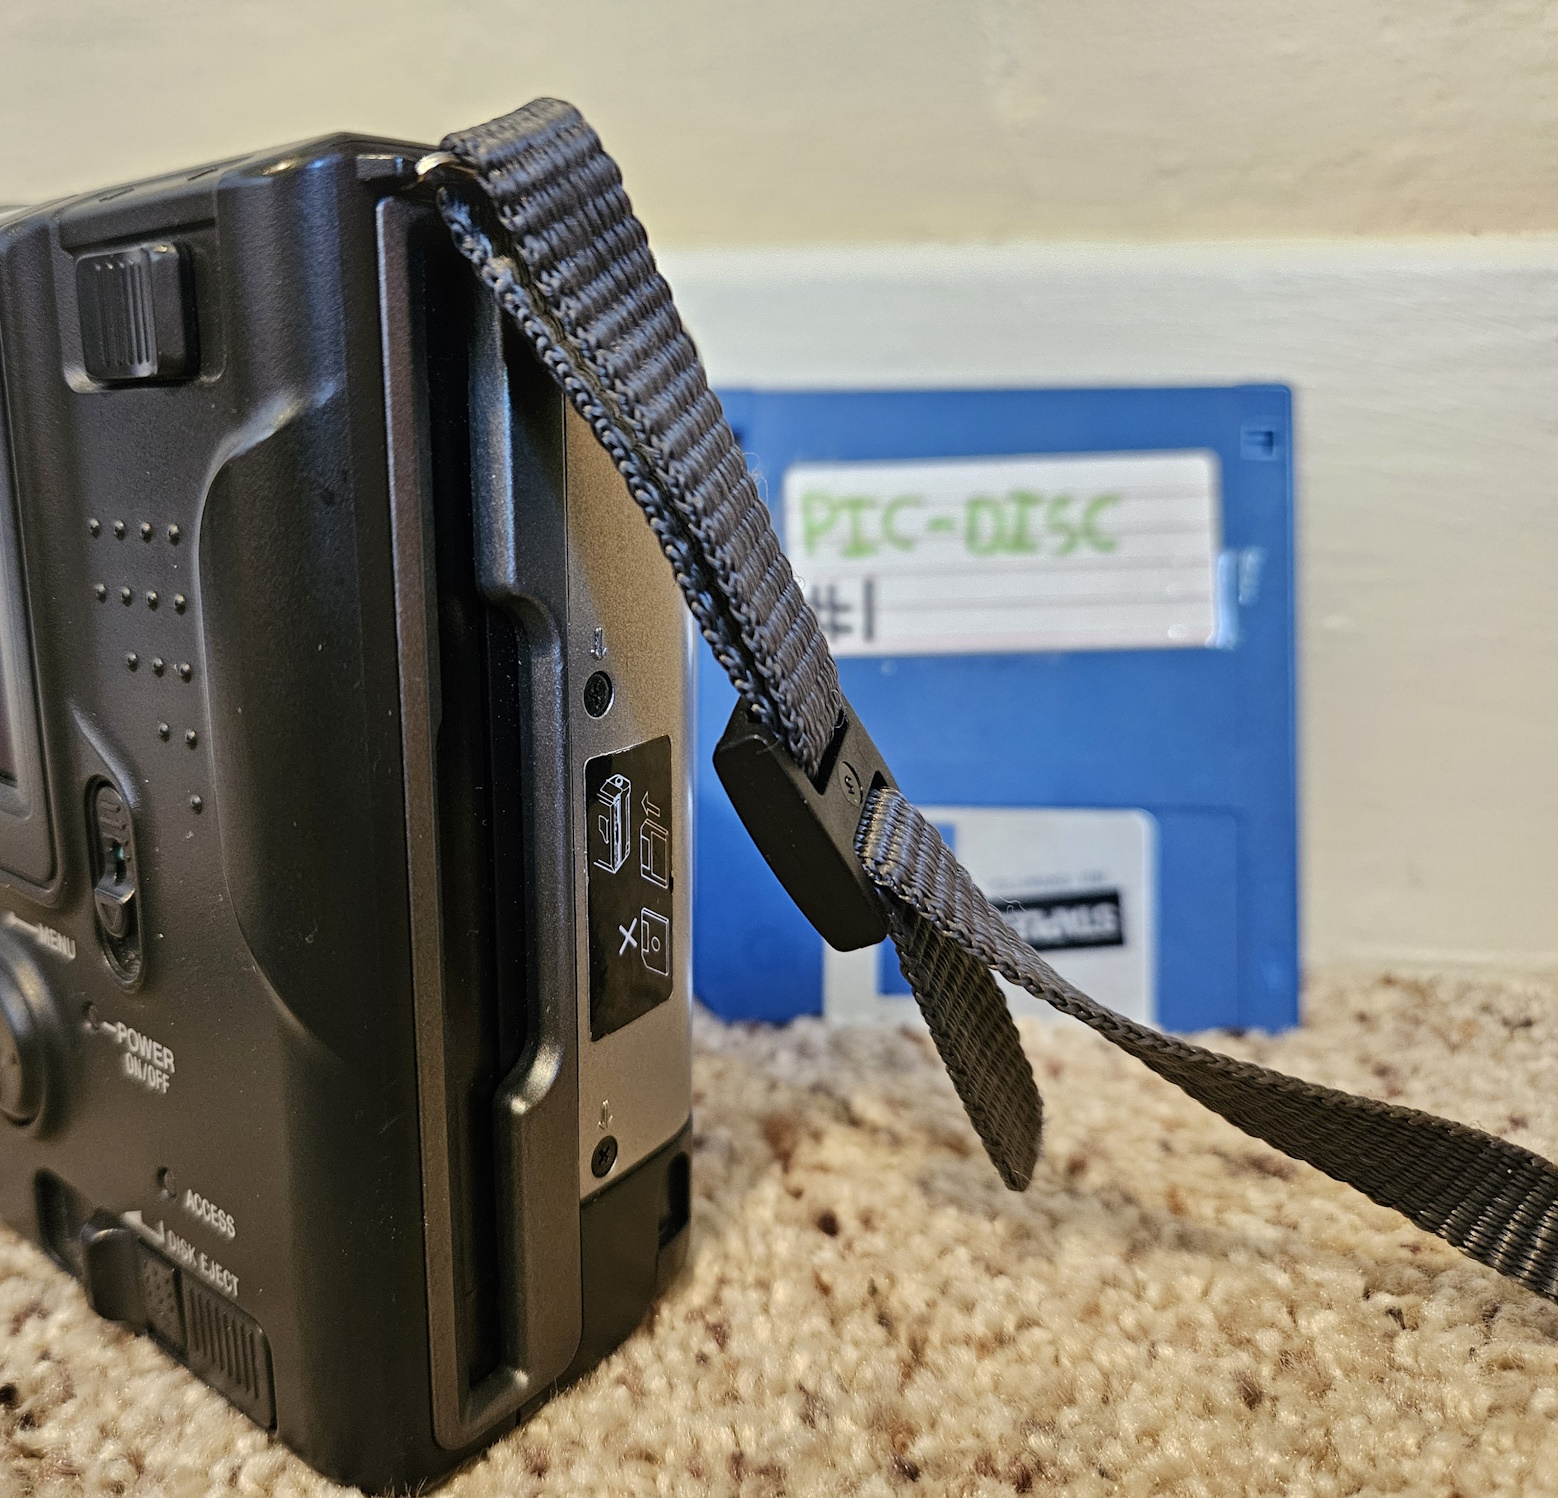
On the opposite side of the floppy drive you can find the switch for selecting the focus mode (auto or manual) hiding under the strap. When set to manual, you twist the silver ring situated on top of the lense to adjust the focus. The yellow port on the lower portion is the video-out jack. The adapter and cable configuration for displaying images to a TV is shown in the manual on page 52-GB.
Alright, lets get to some pictures.

You're already familiar this stinky hairball if you've read my previous photography post on the Sony Cybershot, but for those who are uninitiated, this is Morf. He is my cousin Aaron's golden doodle who I love very much. If you are one of those who remember the previous photo of him in the Cybershot blogpost, you may have noticed that he had recieved a much-needed haircut since that photo was taken. He is also no longer transparent, thank christ.
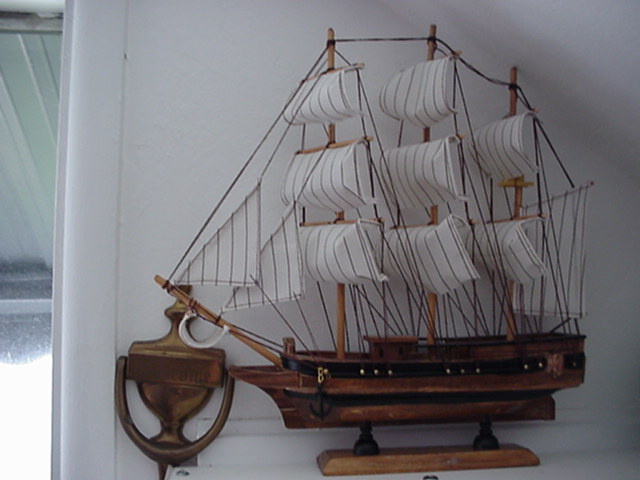
Following the theme of taking pictures of things in Aaron's place (continuing from the cybershot post), I snapped this photo of a ship that he has on display. He's been collecting all sorts of neat antiques and nautical stuff for his place; it's a cool vibe. He doesn't follow any strict guidelines or anything for what he collects. If it's old and cool, it will probably find a home in his apartment.

I thought it would be interesting to see how well the Mavica tackles the hungry flames of a campfire. I'm pretty happy with how it turned out. I like how the glow of the fire illuminates the surrounding objects in the darkness with an orange tint. Don't worry, I noticed the poorly placed firewood next to the fire after taking the photo, and promptly moved it further away from the firepit.
Here's a sample of what the Mavica has to offer in terms of video recording. Pay no attention to the loud-ass air conditioning unit. Still images that are taken with the Mavica, as low as the resolution can be, are still of fairly decent quality for what they are. The same can't be said about the video quality, even though I find it charming. But hey, what do you expect from a video written to a floppy disk?
I don't know what these plants are, but they really sprung to life this spring/summer. I swear that they were just bare sticks poking out of the ground during winter, and now they've exploded into a large mound of funky round leaves.
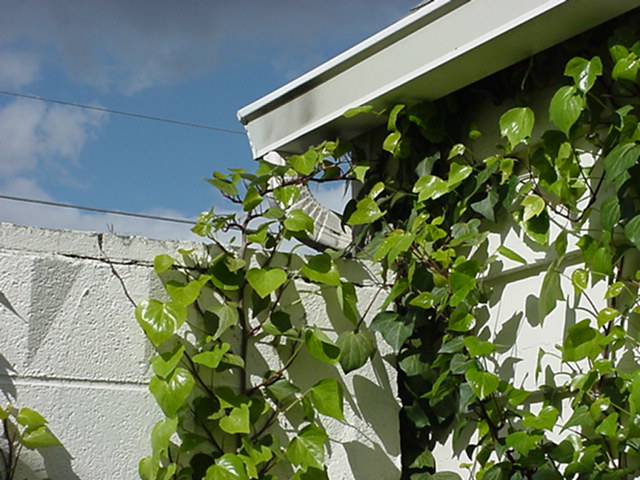
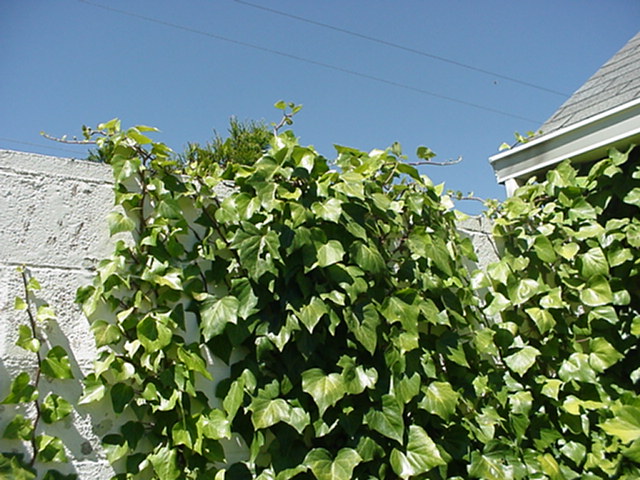
That bush wasn't the only plant to explode spectacularly in my yard (damn that sounds cooler than it is). This ivy has been overtaking my wall very rapidly over the last couple of months. The upper picture was taken on April 4 of this year, while the lower picture was taken on June 22. Much like the bush, I feel like the ivy growth came out of nowhere! You can't even see that corner under the gutter anymore.
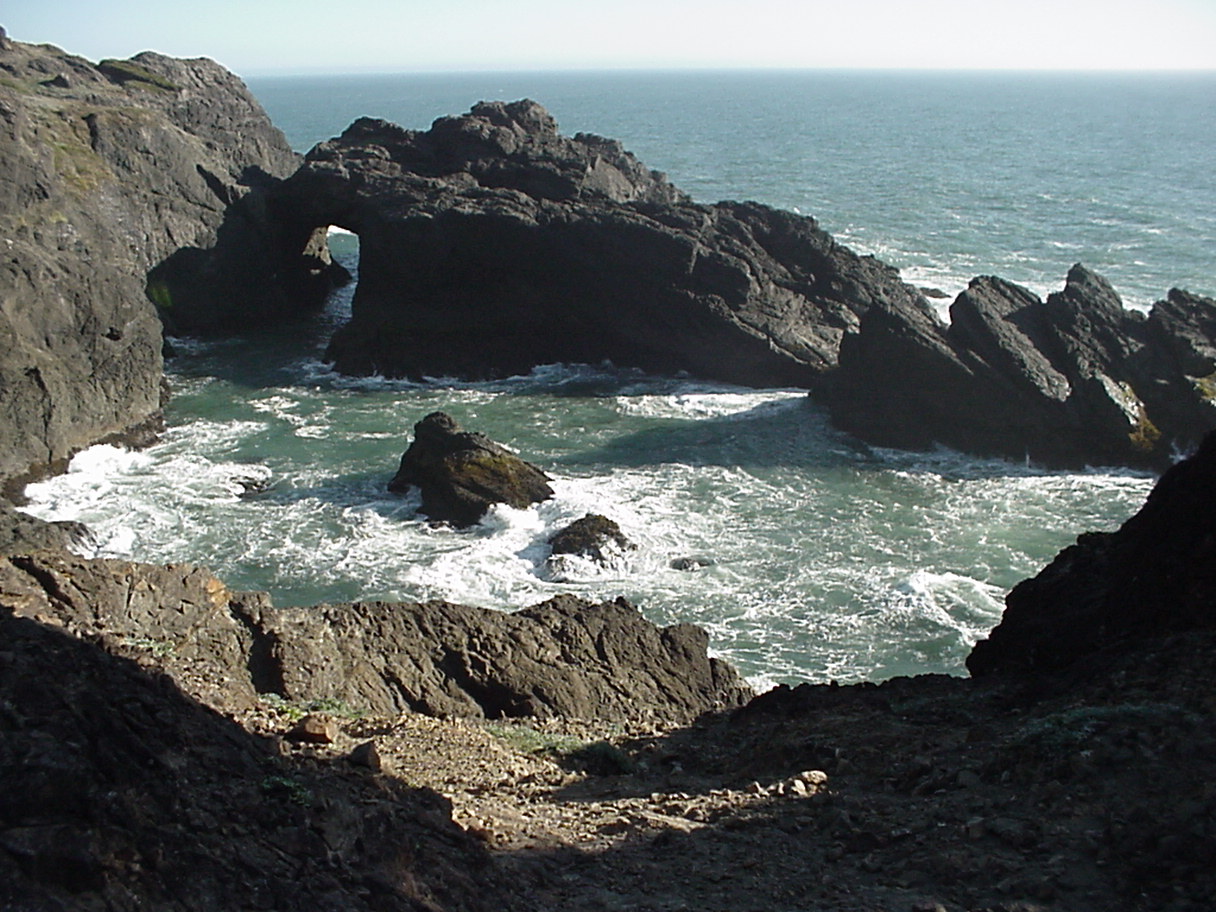
The Indian Sands is one of my favorite places to visit on the Oregon coast. It's located down South just outside of Brookings, near the California border and redwood forest. It's a bit of an uneven and steep hike going downhill, but the views are totally worth it. There's a fucking rock-arch! Waves crashing against cliffs and jagged rocks is one of the sickest things on this planet.
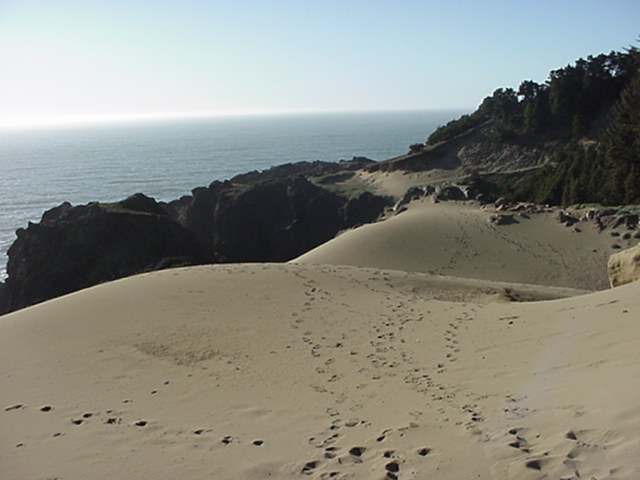
The rolling, sandy dune-like hills made for an interesting shot. I like how you can see the footprints go over the first hill, then you can see them continue on the second hill in the distance. Seriously, the Indian Sands is home to some really jaw-dropping terrain.
I even splurged a little bit for that photo of the arch, shooting it at the maximum resolution of 1216x912. It was also the scariest one to take as I inched closer to the downward slide to certain doom with a brick hanging from my neck. The extra weight and swaying of the camera was a bit cumbersome during the hike, but the photos were 100% worth it.

This photo was also taken at the Indian Sands. The sun blasting sharp beams of light over the ocean is pretty sick. Obviously the sun didn't actually look like this, but I think it's neat looking. Something that I find odd about this photo are the vertical "spikes" poking out of the top and bottom of the sun. If you look at them closely, the spikes are very high-contrast; pure white with a dark border surrounding them.
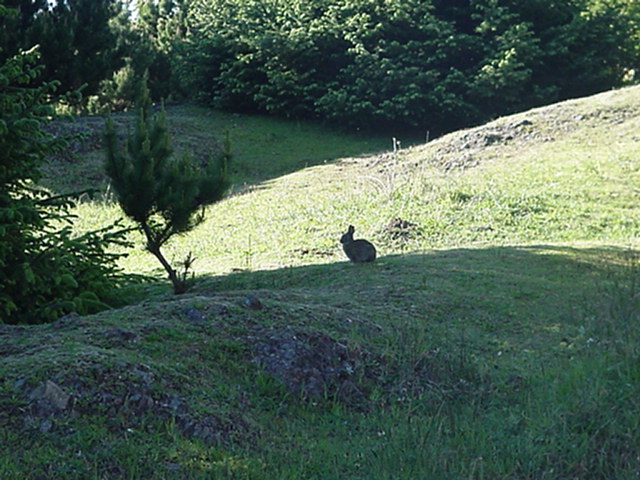
Although this photo of a rabbit is my final photo from the Indian Sands, it's not my final photo of the coast just yet. This was the closest photo I was able to take before the rabbit got sick of my shit and ran off. You can't see any details of the rabbit, with its silhouette being the only indicator of that dark blob being a rabbit.
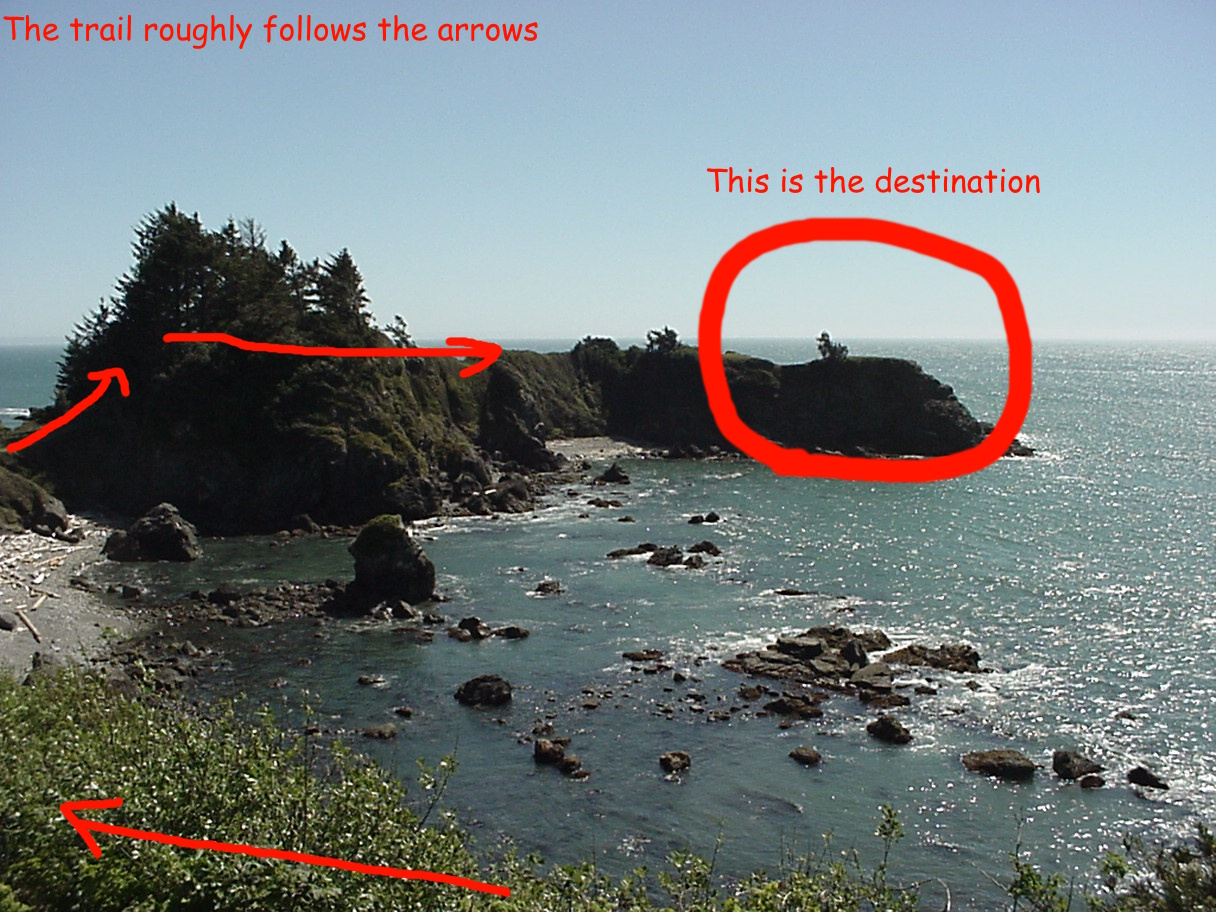
Also down in Brookings is spot called Chetco Point. This destination is actually in town. I remember like, 10 or so years ago there was a chunk of whale that washed ashore on a beach there and it stunk to high heaven. Luckily there were no whale remains this visit. Chetco point itself is that rocky bluff out in the sea; there's a trail that leads to a plateau with a sweet view of the ocean and of the town.
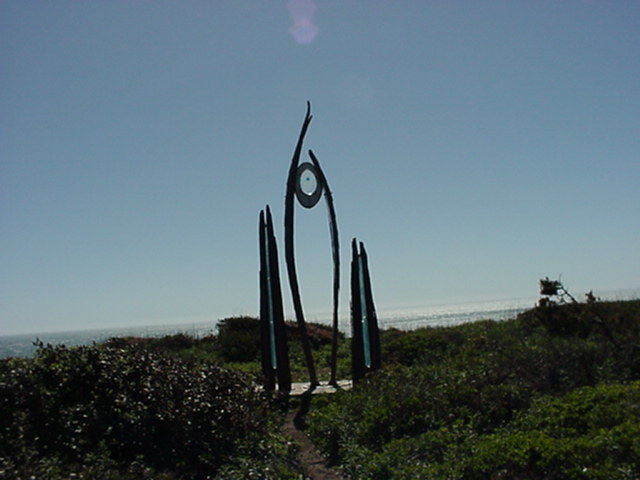
Here's a poorly lit photo of one of the first things you see upon reaching the plateau. I believe the art piece is called "Two Rivers and the Heart of the Ocean". It looks mystical.
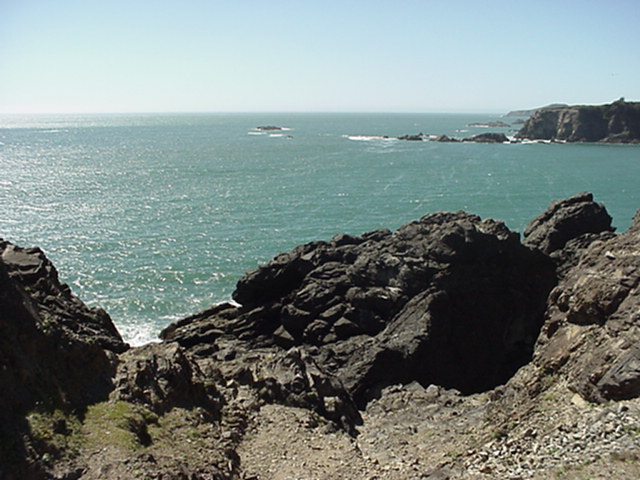
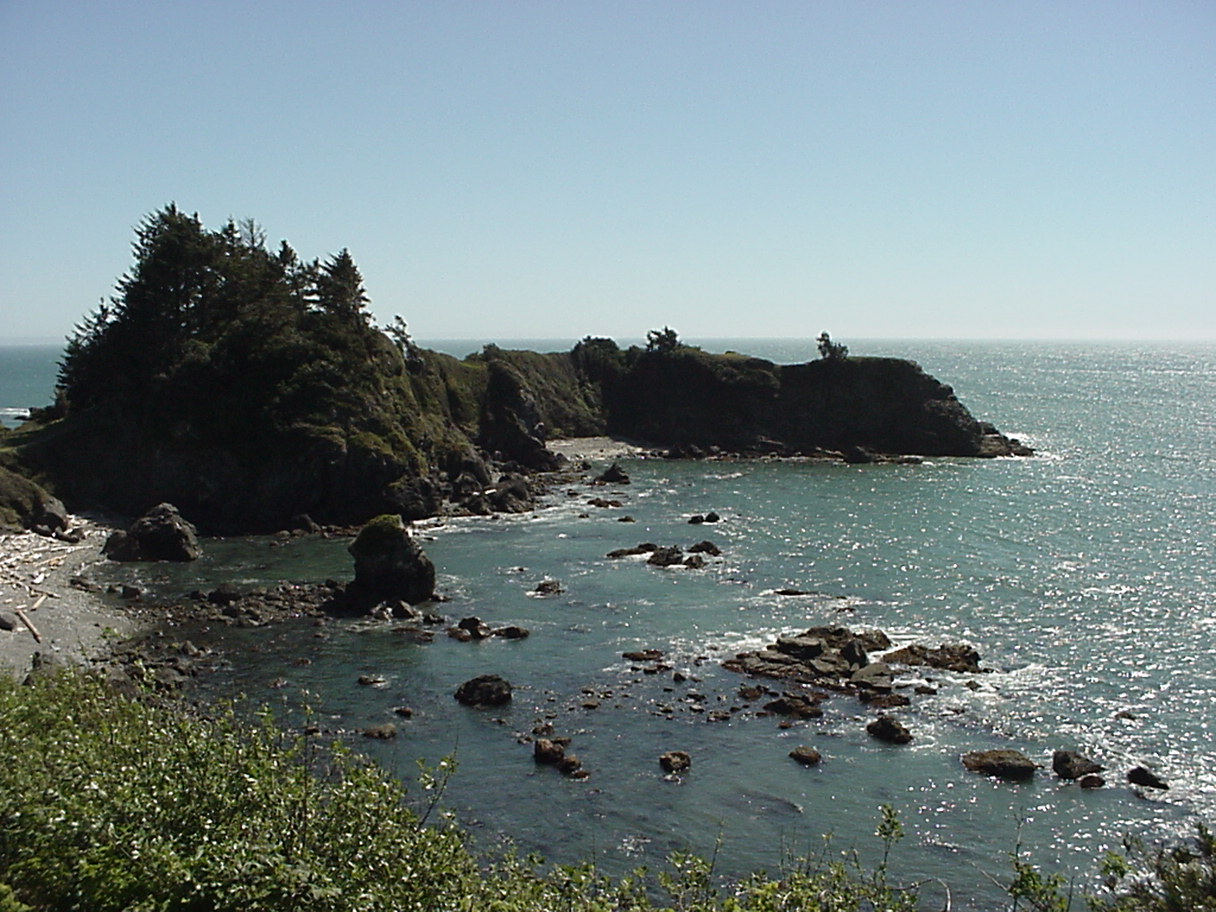
Looking out at the sea from up there, you can see rocky cliffs continuing North up the coast. It's a serene place to be, especially during this visit as I was somehow the only person present.
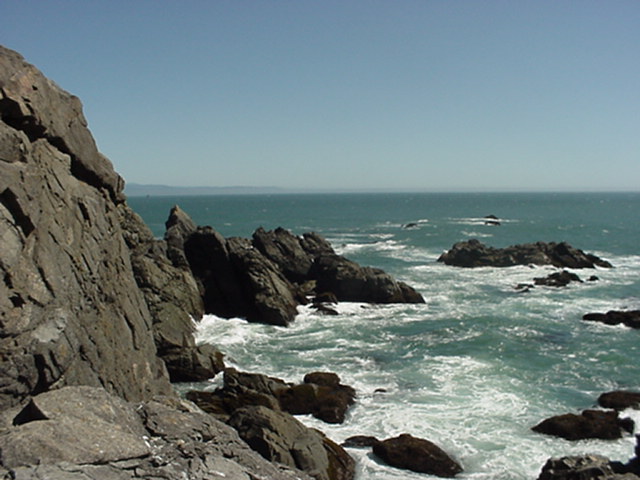
Here's a closer view of the ocean and rocks on the sea-facing side of the bluff.
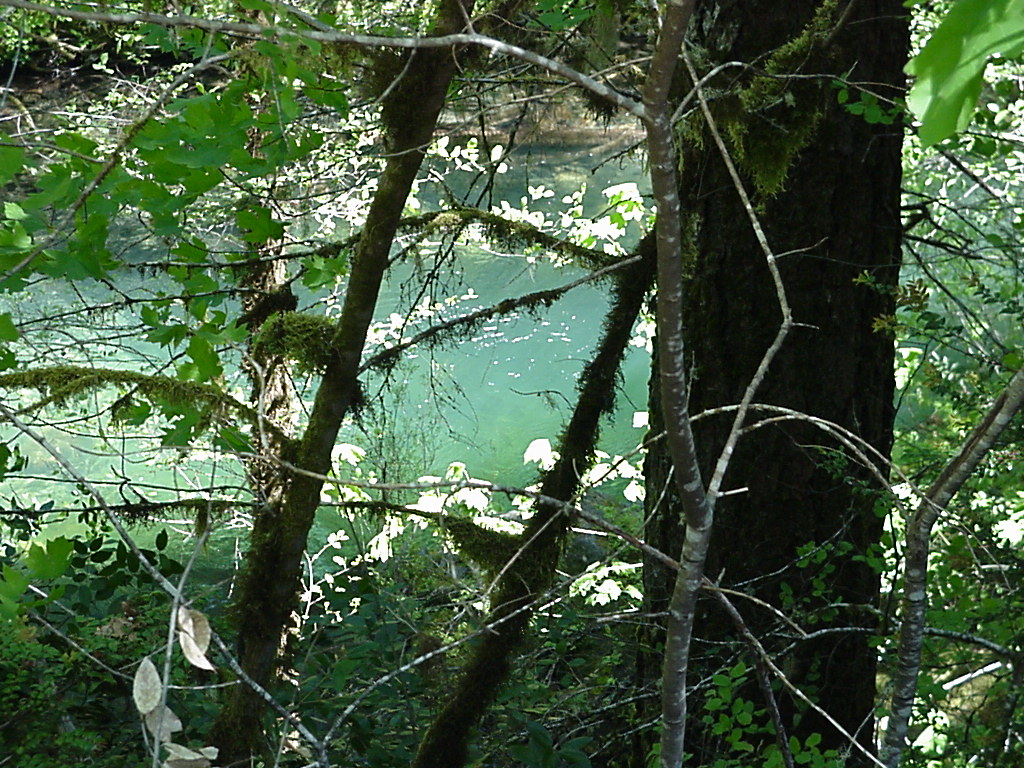
During a lengthy rockslide cleanup stop on highway 101, I got out of the car to wander around a bit. Looking down a steep cliff and through some branches I was able to snag this shot of the Smith river. I love the green color of the water in this picture. The river often looks green in real life as well during that time of year (Photo was taken in May).
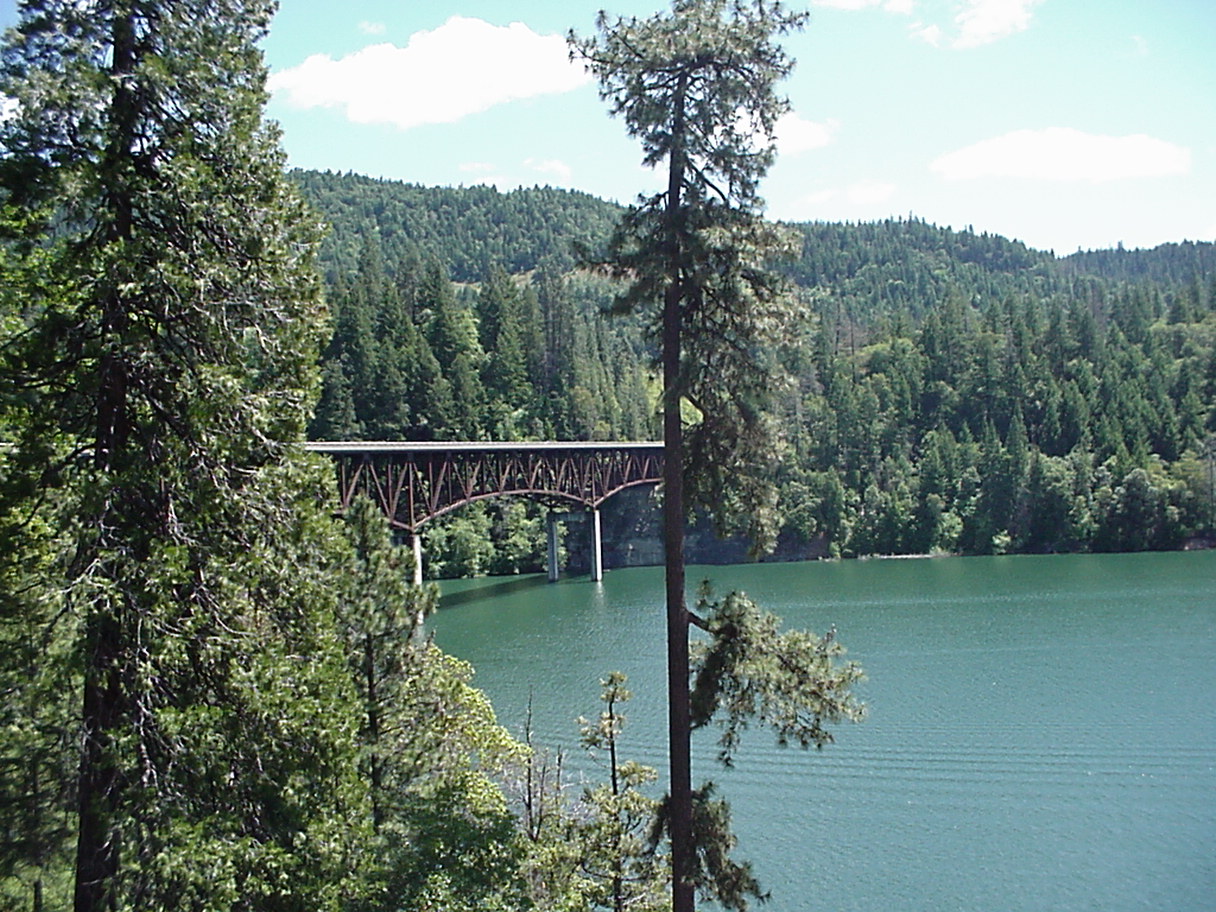
This is the bridge going over Lost Creek Lake, located on the way to Crater Lake.
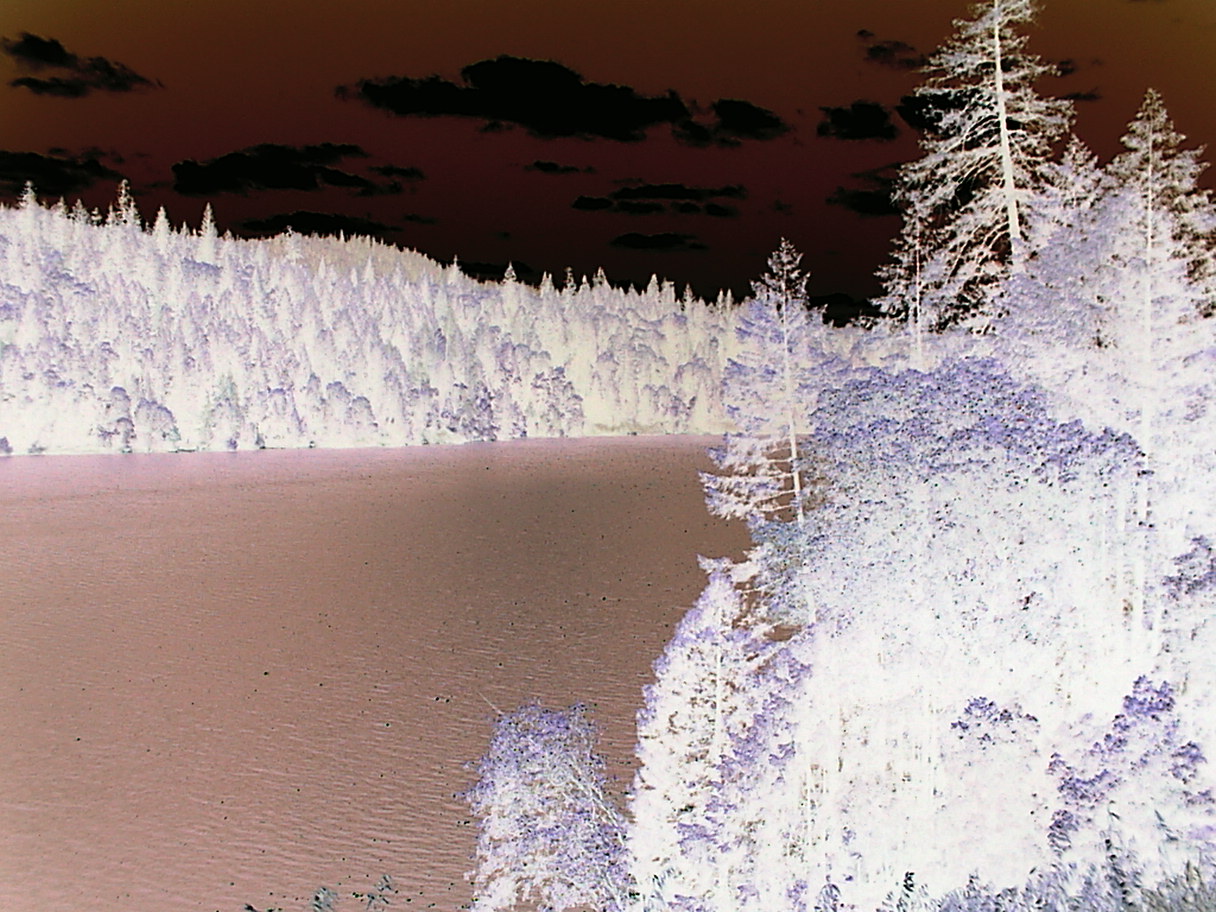
I took this photo from the same area except instead I was aiming to my right, looking away from the bridge. The mavica features basic picture effects, that are active as you take a photo. In this case I used the invert (negative) effect, but some other effects include, sepia, black & white, and solarize. All of which are cycled through when you press the dedicated "picture effect" button.
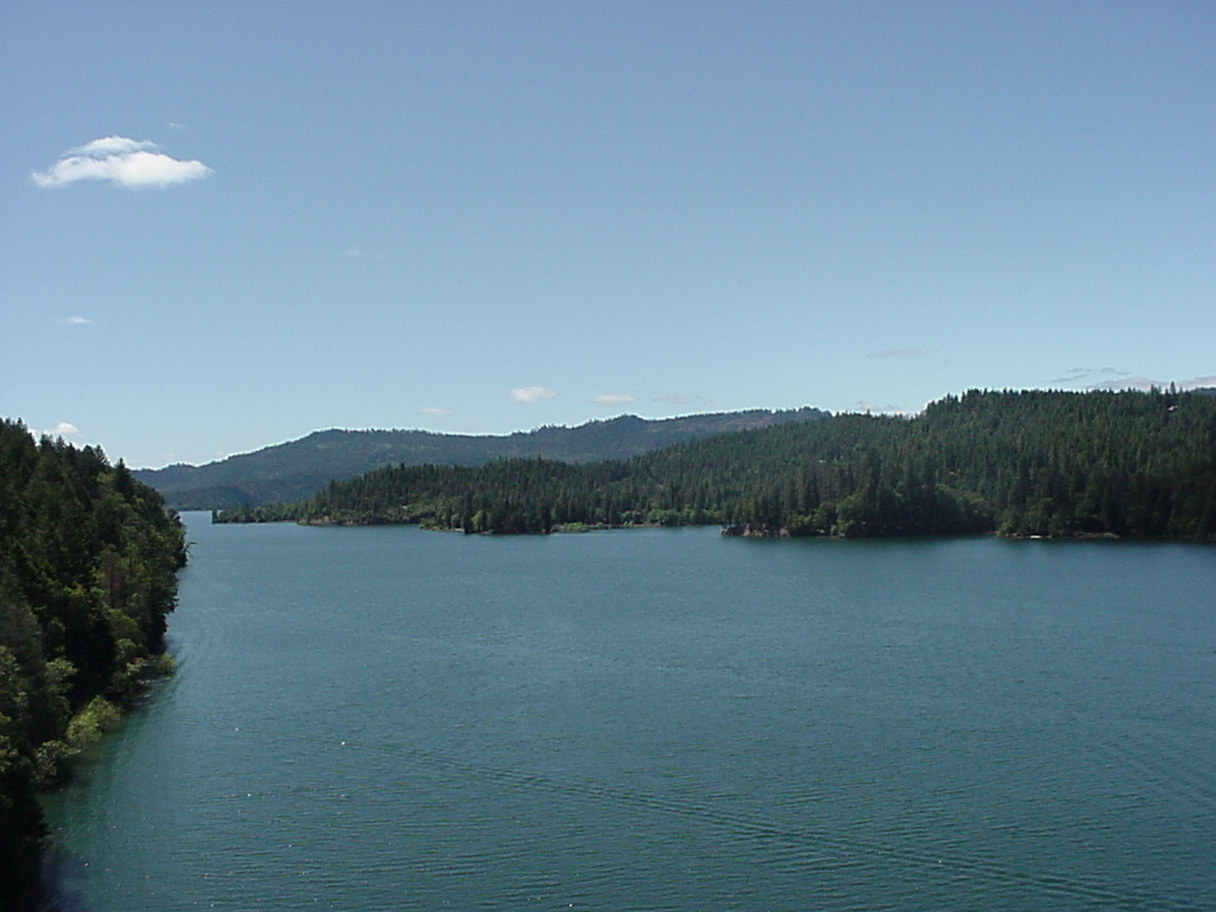
This photo was taken from the bridge itself, looking out at the lake.
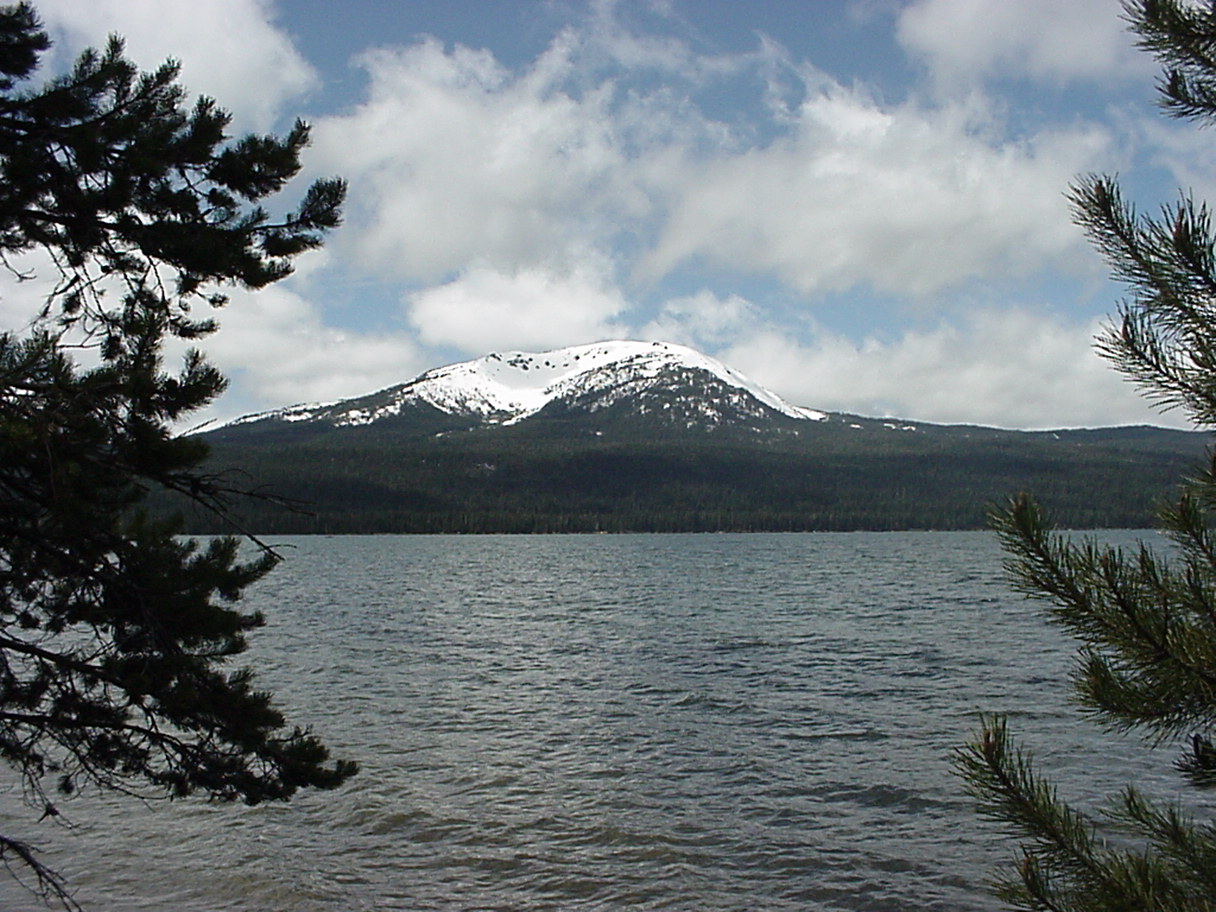
Finally, here's a dull photo of Diamond lake. The colors are washed out pretty bad in this pic, but the snow-covered mountain is very nice.
This camera has been pretty fun to use. I love how after every picture you can hear and feel the clicking and vibrations of the floppy-drive hard at work writing that 69KB photo as fast as it can. Every shot is a reminder that the insane engineers at Sony managed to cram a floppy disk drive into a camera of all things.
Even though the photos are low res, they don't look half bad for the most part (as long as you don't zoom in). Colors were typically more dull than what I was trying to take a picture of, but sometimes the vibrancy would pull through.
While it's certainly a hinderance, I kinda enjoyed the space limitations of this camera. All digital cameras these days can hold thousands of photos on them, so you can afford to take tons of pictures of the same thing and pick the best out of a batch to save. That's not very convenient to do with the Mavica.
On the trips that I took the camera with me, I usually carried up to 2 floppy disks with me. One in the camera and a spare in my pocket for when the one in the camera inevitably fills up. That's 2.88MB of photo space to work with.
It also takes slightly more time than normal to capture or delete a photo. Like I said, after every photo it takes a couple of seconds to write to disk, and you can't do anything else while it does that. The larger the photo or video, the longer it takes to write. Photo deletion also takes a bit of time to process. It's not a very long amount of time, a few seconds at most, but the delay is present.
Overall, the Sony Mavica is an interesting relic of the past that is fun to use if you're a weird tech nerd and/or a smelly fucking hipster. As someone in that category, I find that it's charming to use and I enjoy the extra thought that you have to put in for storage space management while shooting.