Replacing My Pokemon Crystal Battery
R.I.P. Totodile :(
 Toolbox Toolbox |
April 8, 2024 |
I started another playthrough of Pokemon Crystal sometime last year, and was disappointed to see that my copy no longer saves. I made it to Goldenrod City, but then the next time I played my save file was no longer there. Welp, there goes all my progress!
It's common for old cartridge games with save capabilities to lose their ability to save, but luckily it's a simple fix. Almost every cartridge-based game before the GBA has a coin-cell type battery soldered onto the circuit board. So, if your old cartridge no longer saves, then it's most likely that you just need to replace the 20-30 year old battery that's somehow lasted up until now.
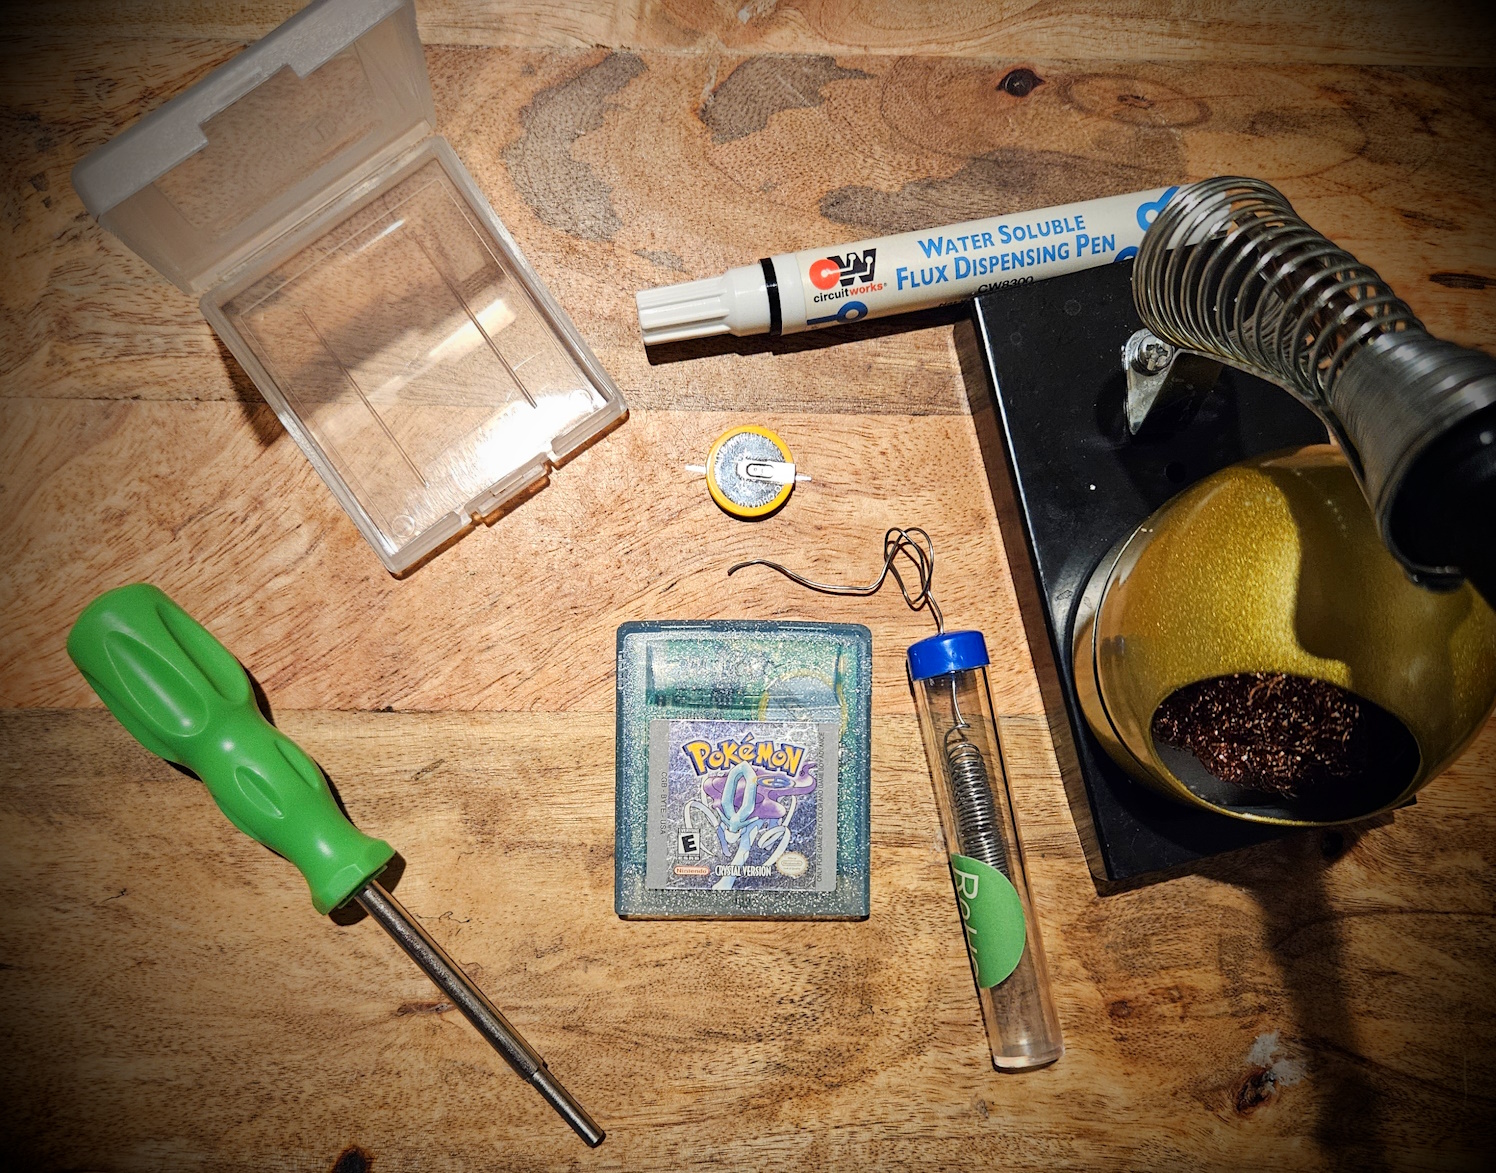
Since I'm opening up my game cart to replace the battery, I figured I'd write this post as a sort of guide for anyone looking to replace their own cartridge batteries.
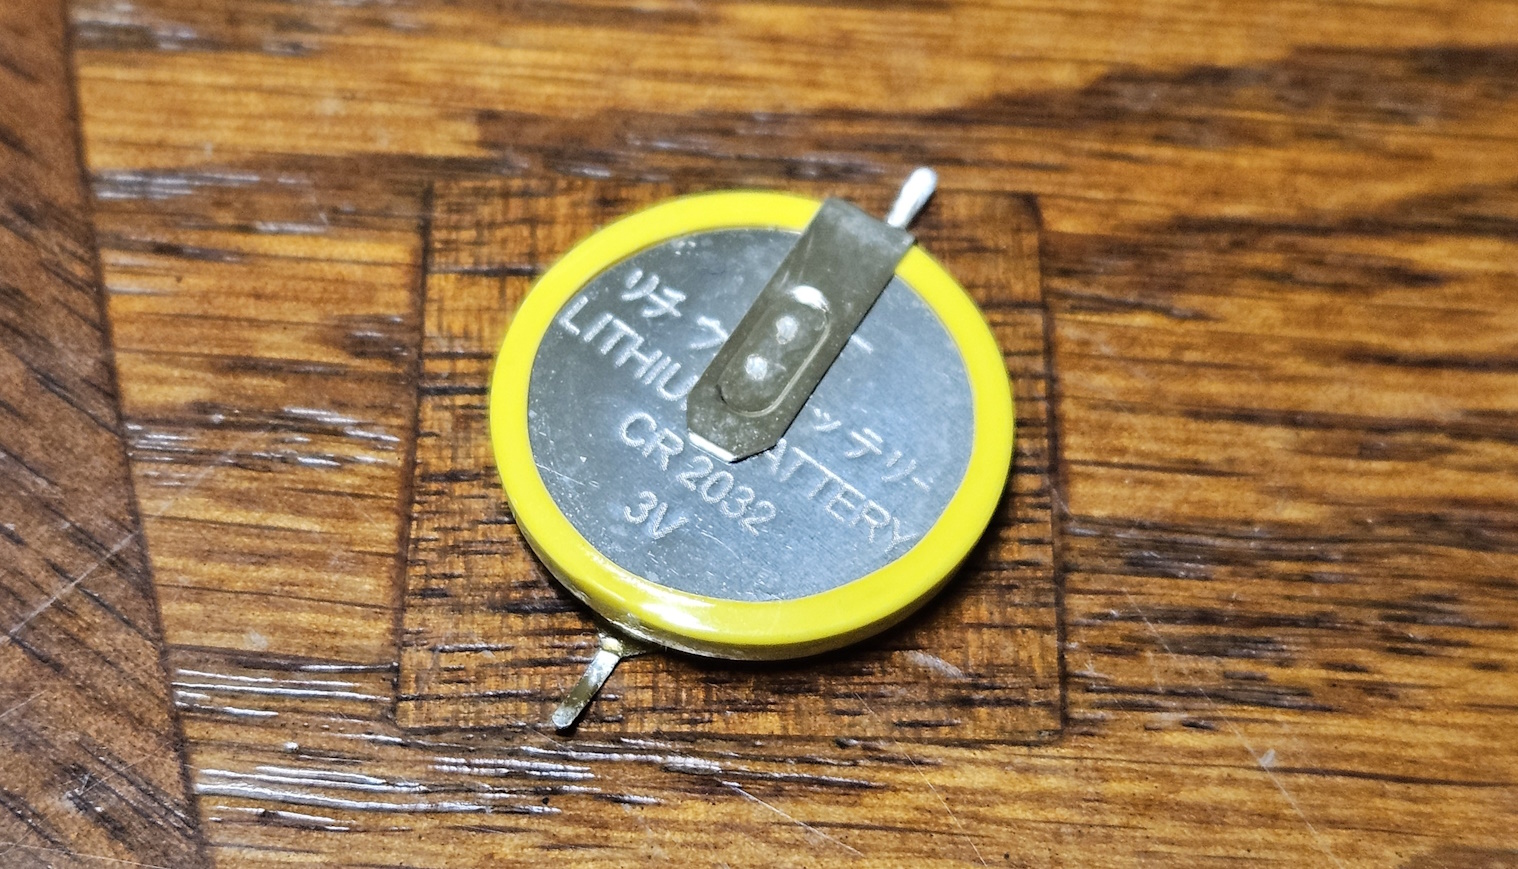
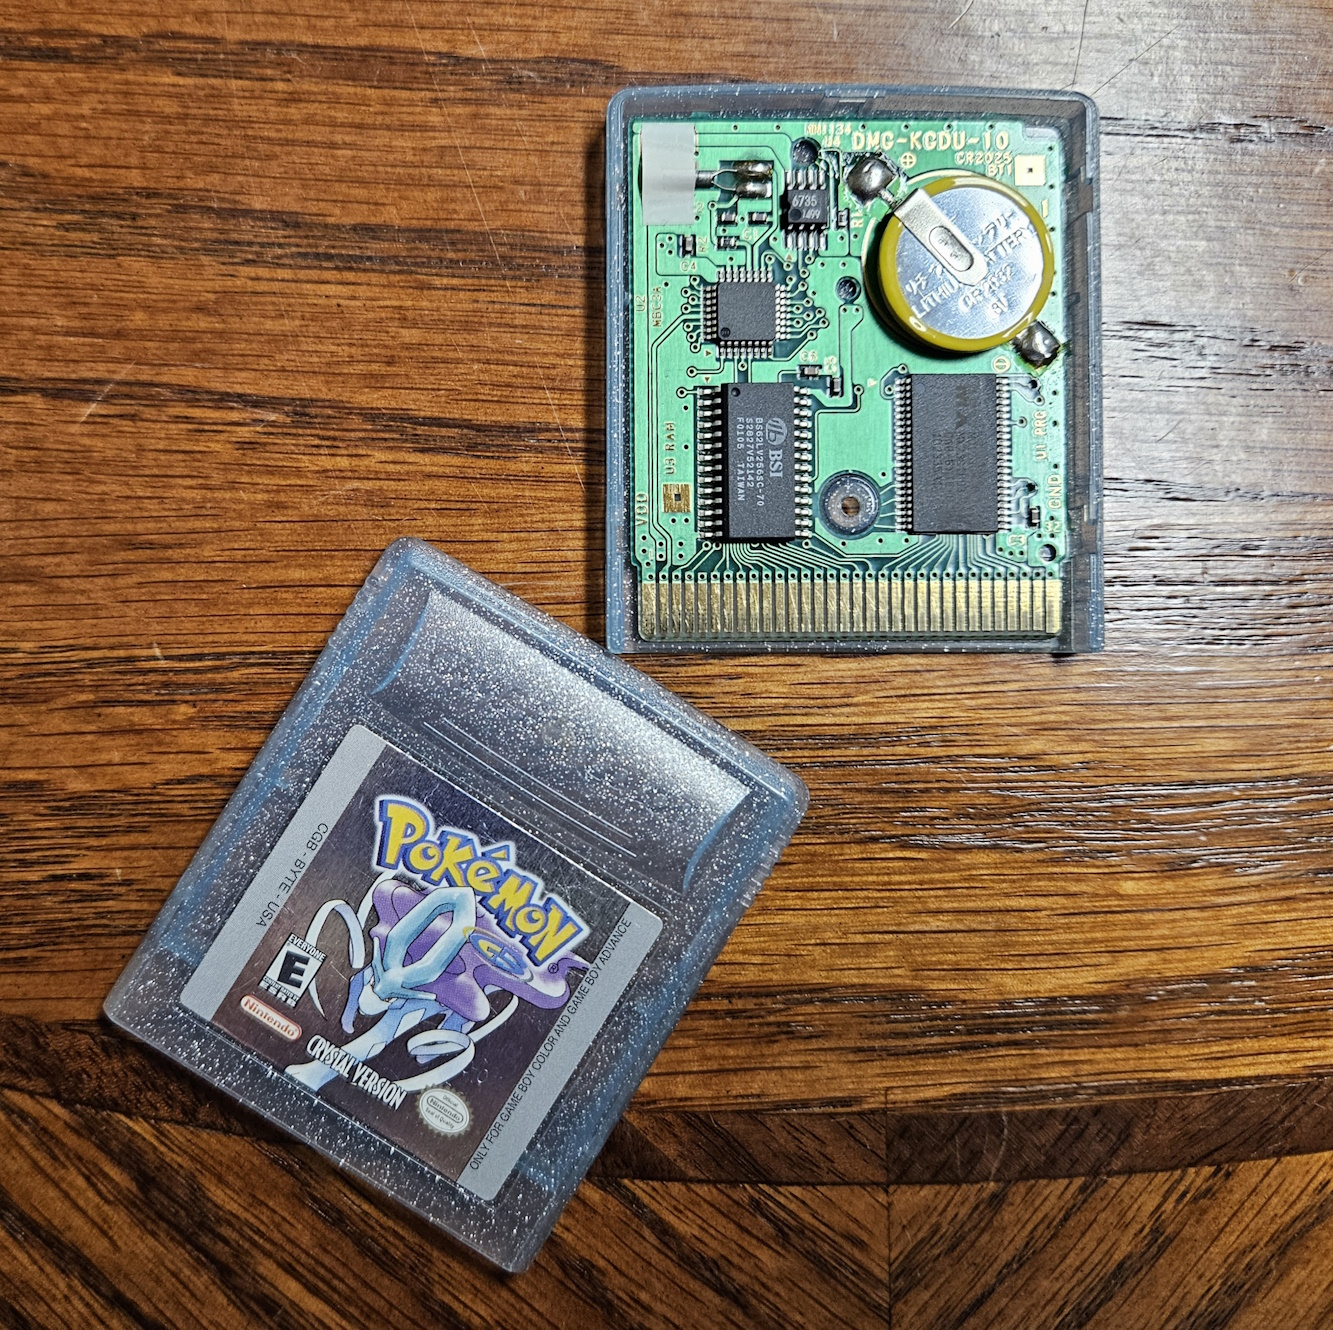
I bought my copy of Pokemon Crystal back in 2014, which was also the last time that the battery was replaced (by the seller). Well, 10 years later it seems to need a new one again. Gameboy Color and OG Gameboy carts use CR2032 batteries with leads on both ends. You can't just buy a pack of CR2032 batteries at Walmart and use those, it has to have those metal leads so that it can be soldered onto the board.
Before I continue, I want to mention that you will need a soldering iron for this. Please, for the love of god, DO NOT cut the old battery out with pliers or something and tape down a new battery with electrical tape. That's dumb.
I feel like a lot of people are scared of soldering, but it's really not that bad. I learned how to solder replacing Pokemon batteries, and I think it's probably one of the easier ways to learn how to solder. Metal stick gets hot, and makes circuit board metal hot. Remove hot metal stick, now circuit board metal get cold fast. There's a bit more to it than that, but that's the basic idea. Much like every other skill, you kinda get a feel for it as you get more practice. The solder seeks the hot iron. Don't touch the hot iron and don't breathe in the fumes.
Please do your own research on soldering as well as soldering safety before attempting to solder. While I can solder stuff and have a good amount of experience doing so, I don't consider myself an expert at it. The methods and tips that I talk about in this blogpost are from my own experiences, and most likely isn't the definitive way to do it.
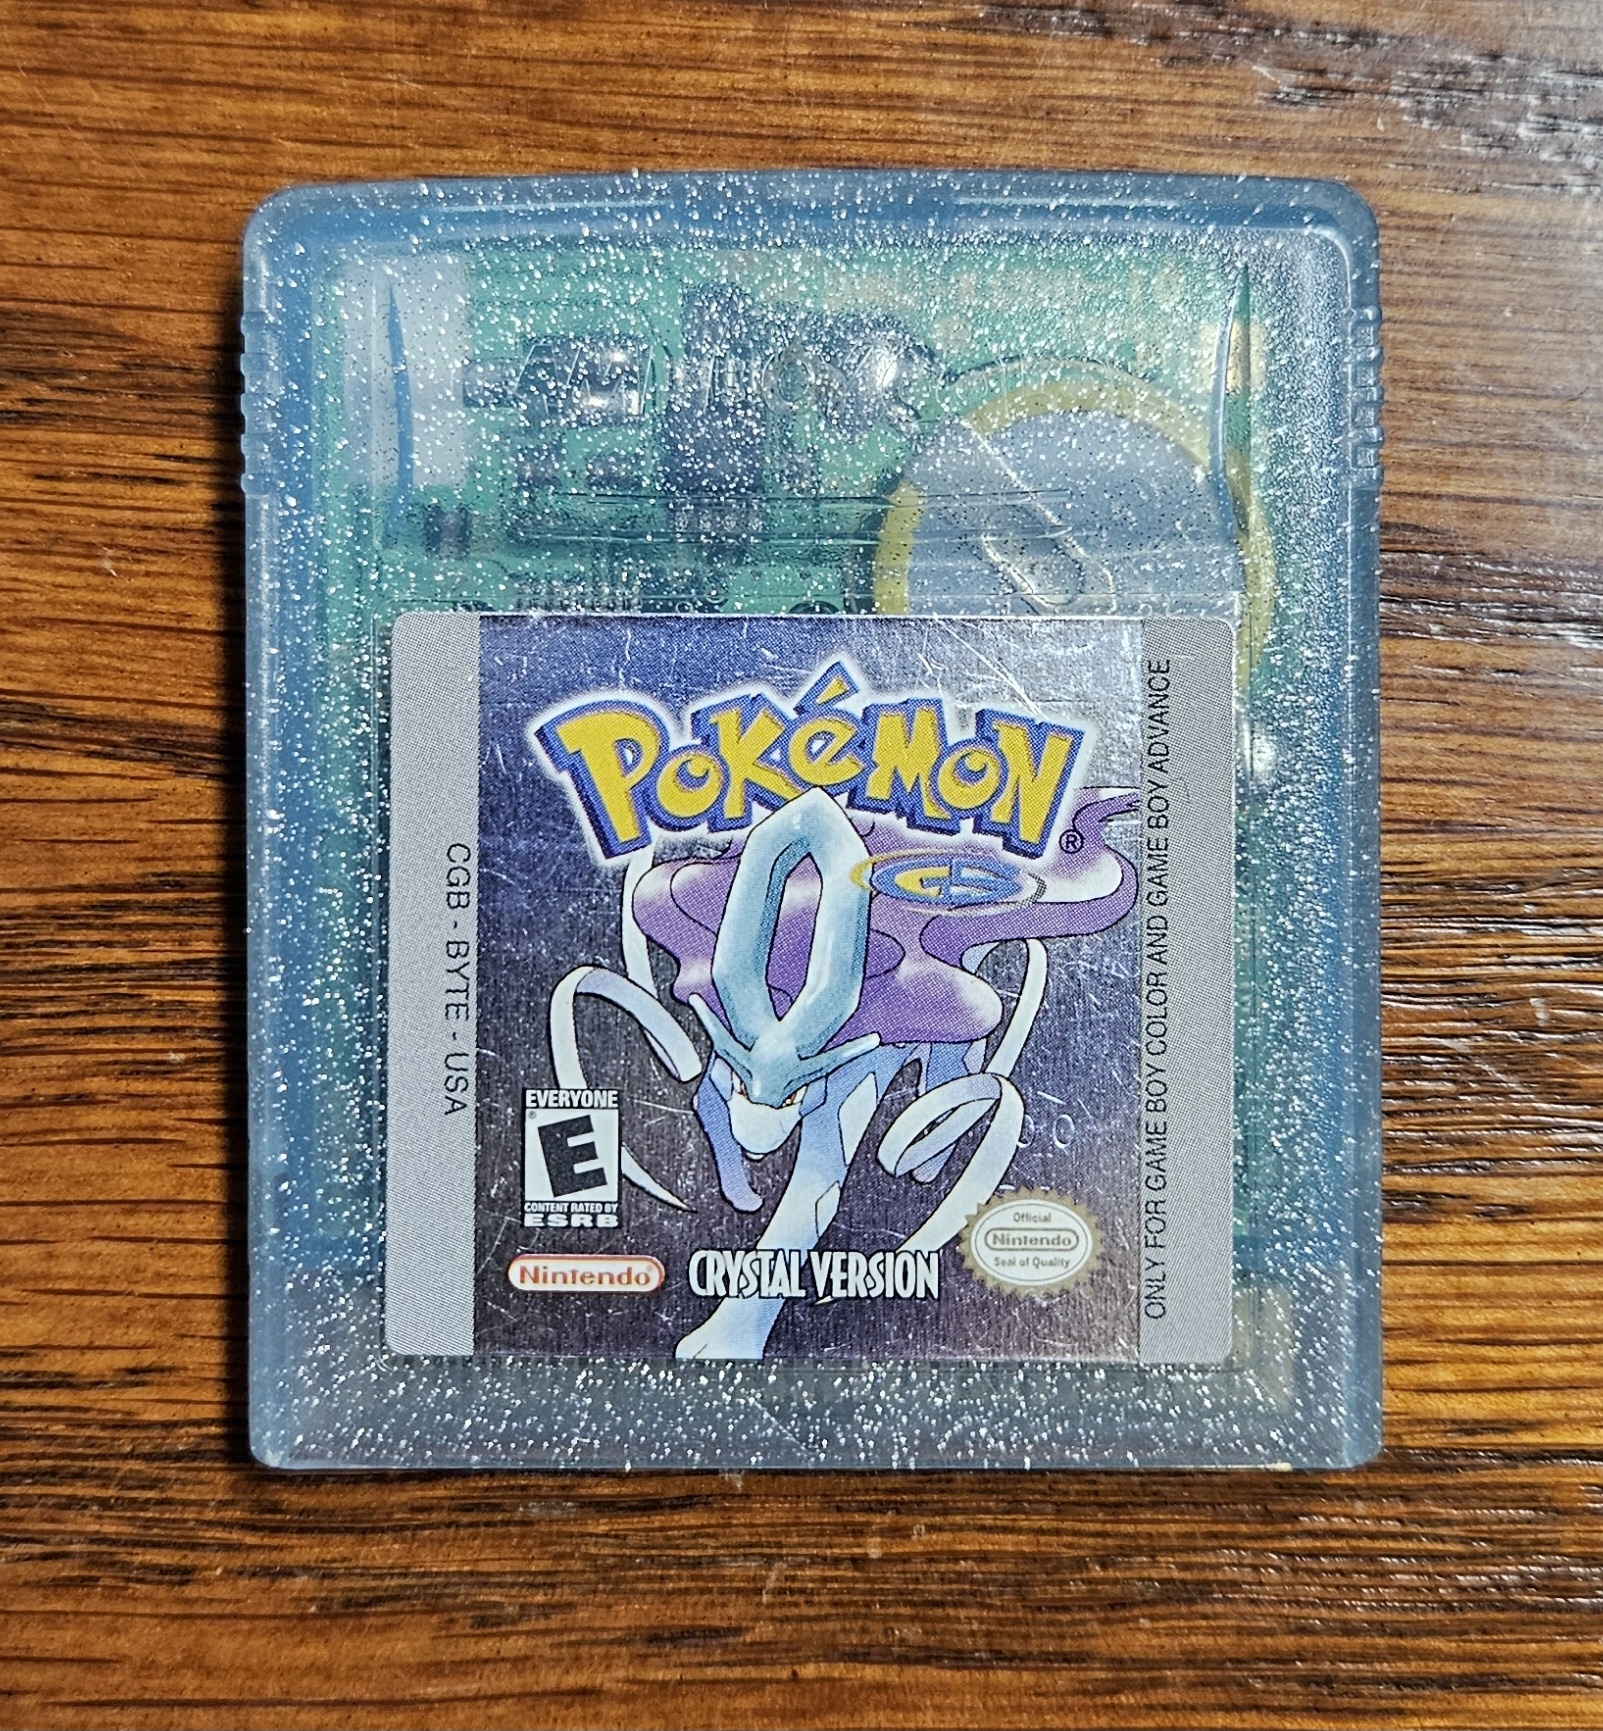
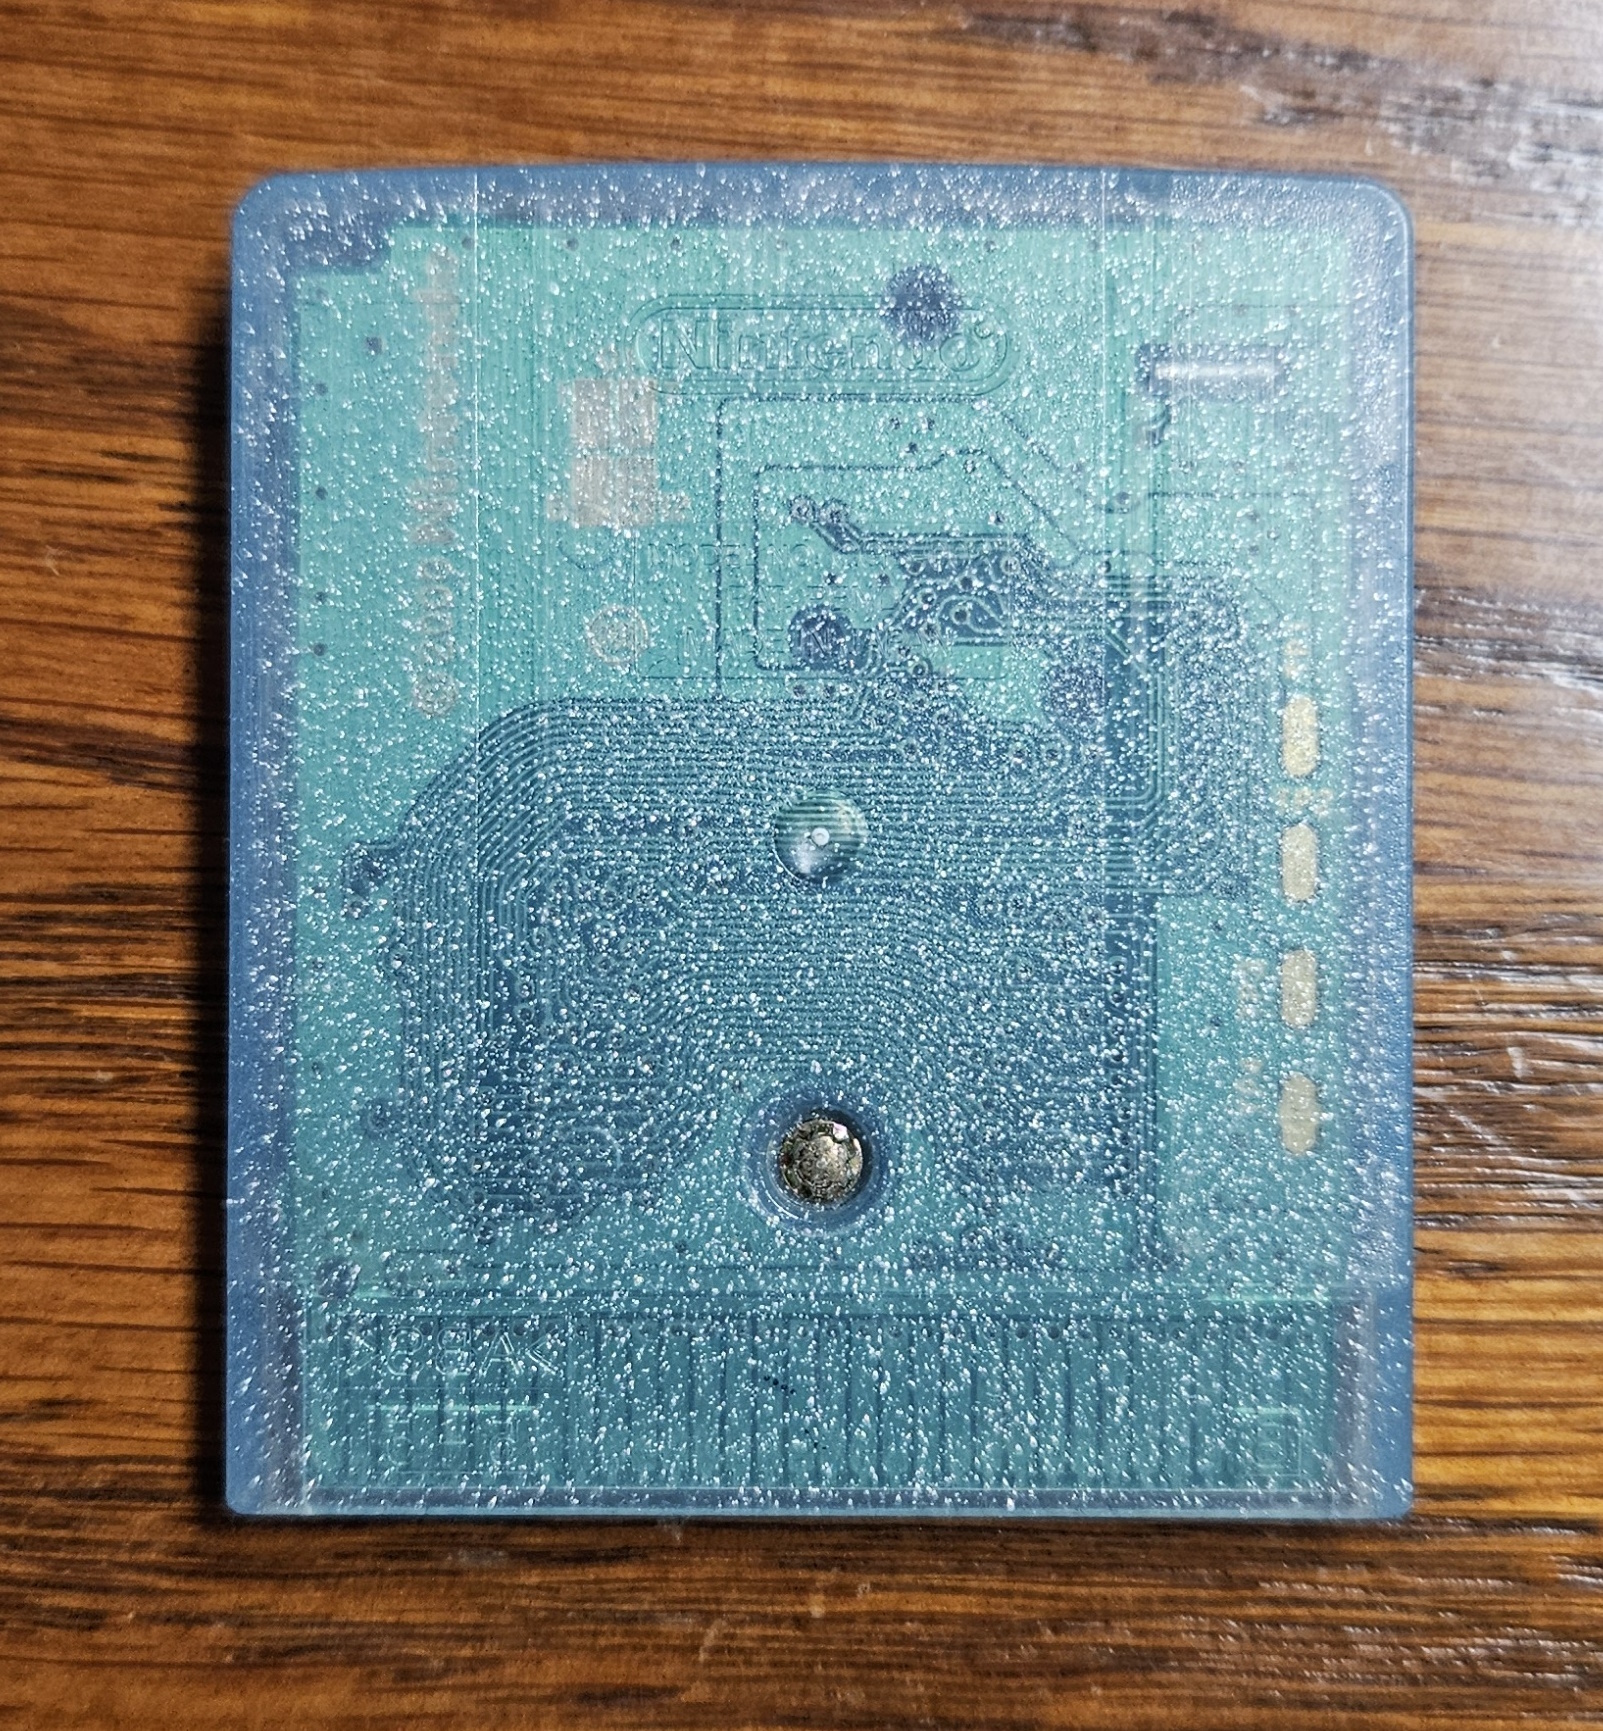
This is my copy of Pokemon Crystal. You'll notice that, like all GB games, it's held together by a single game-bit screw on the back.
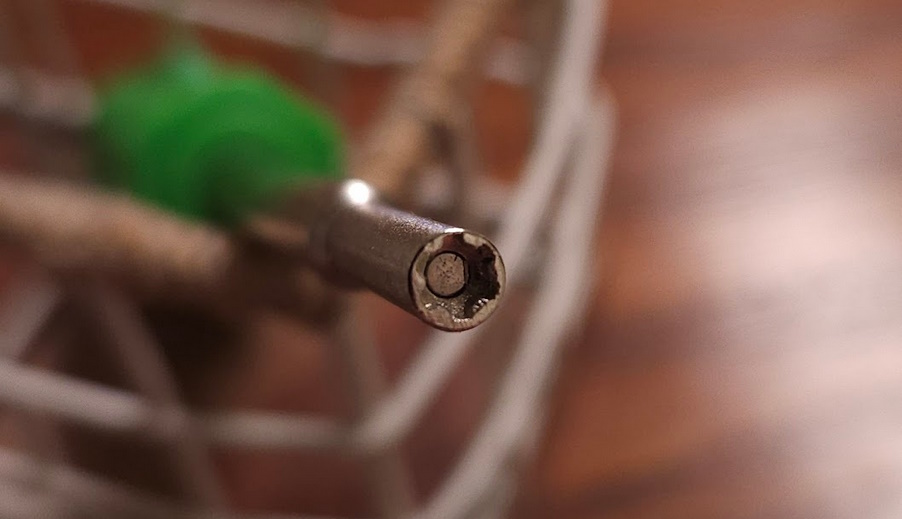
The screwdriver that's needed to remove these screws aren't common in brick-and-mortar stores, but you can find them online pretty easily. I bought a pack off Amazon for $9 that contained a 3.8mm gamebit screwdriver as well as a 4.5mm one. The size that is needed to open many game cartridges is the 3.8mm screwdriver. The 4.5mm size is used for opening up consoles like the N64 or Gamecube, so it's handy to have around.
You'll want to remove the screw, then slide the label-side of the cartridge towards the pins. After the top-half is slid downwards, it can be lifted up. The PCB will now be sitting on the back-half of the cartridge shell. You'll want to remove the circuit board out of the shell before getting your soldering iron anywhere close to that battery, so that you don't melt the outer shell.
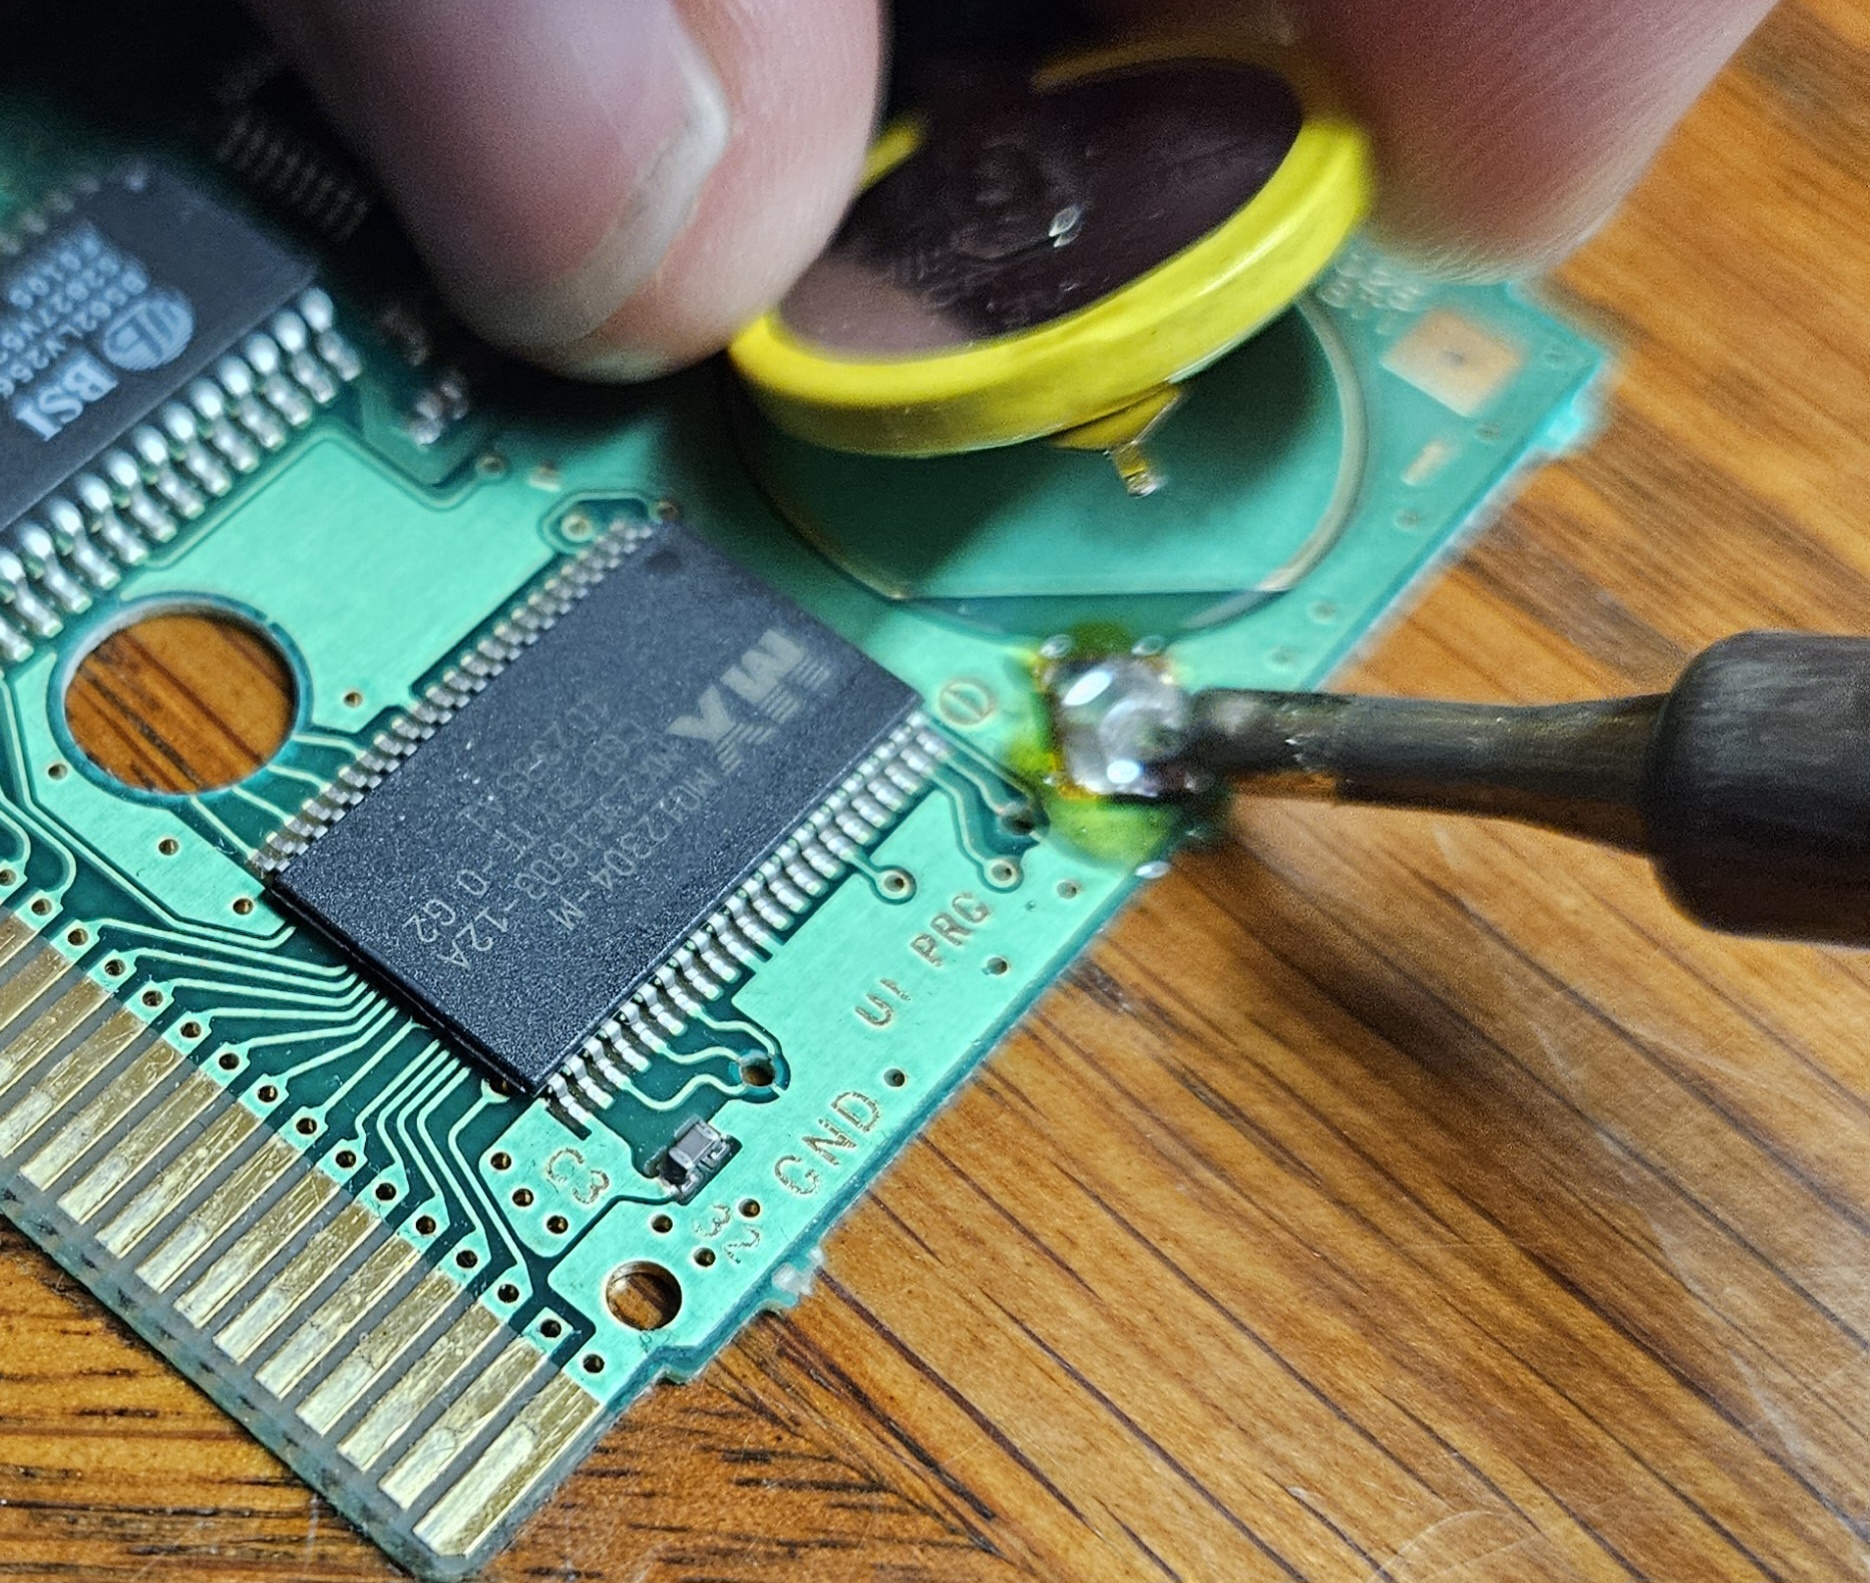
With the soldering iron warmed-up and ready to go, you're pretty much ready to go. I applied some flux to the solder joints (the points where the battery tabs are mounted to the circuit board) for a clean and easy removal of the battery.
Before proceeding, note the orientation of the battery. You'll want to know where the positive and negative leads are on your replacement battery, so that you can place it in the correct orientation. The positive and negative pads on the circuit board are marked with a "+" and "-".
To remove the battery, simply touch one of the solder joints with the soldering iron. Once the solder is hot and jiggly, use a tool (or your fingers if you're a caveman like me) to gently lift that side of the battery away from the now-liquid solder joint. I only start lifting the battery once the solder is in its melty state ("melty state" being the scientific term, of course). Once the lead is fully removed from the solder, remove your soldering iron and let the solder joint cool back down. Now, repeat this for the lead on the other side of the battery. Congratulations, you've removed the battery!
Now it's time to solder the new battery onto the board. To do this, I pretty much do the inverse of what I did to remove the battery. I heat up the same solder that held down the previous battery, then I inserted the correct lead into the hot glob of solder. I added some fresh new solder onto the old solder to better hold down the leads. One could replace the old solder completely if they wanted to, which is probably technically better, but I think the way that I do it works fine.
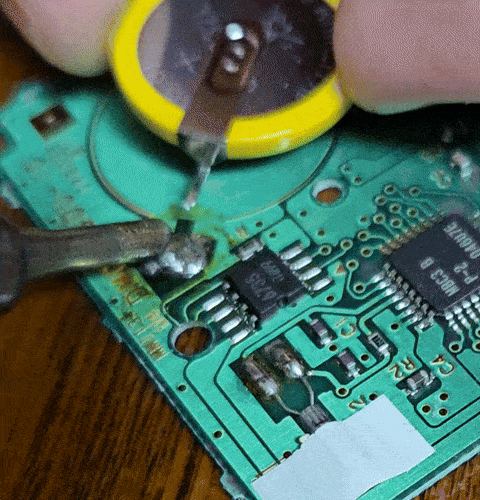
You may need to go back and forth re-heating the solder globs to adjust the leads to a position that's just right. Ideally, both leads will be mostly submerged in the solder and the battery is flat on the circuit board. In the case of this Pokemon Crystal board, there is a handy outline of where the battery should be sitting.
I don't have the battery lined up perfectly in the gif above, but it does demonstrate the process a bit. After filming I re-heated the glob in order to adjust the battery's position so that the negative lead was lined up properly on the negative pad. It's probably hard to tell, but notice how the solder seems to become less "reflective" once it cools down. That's what indicates that the solder is no longer in the "melty state".
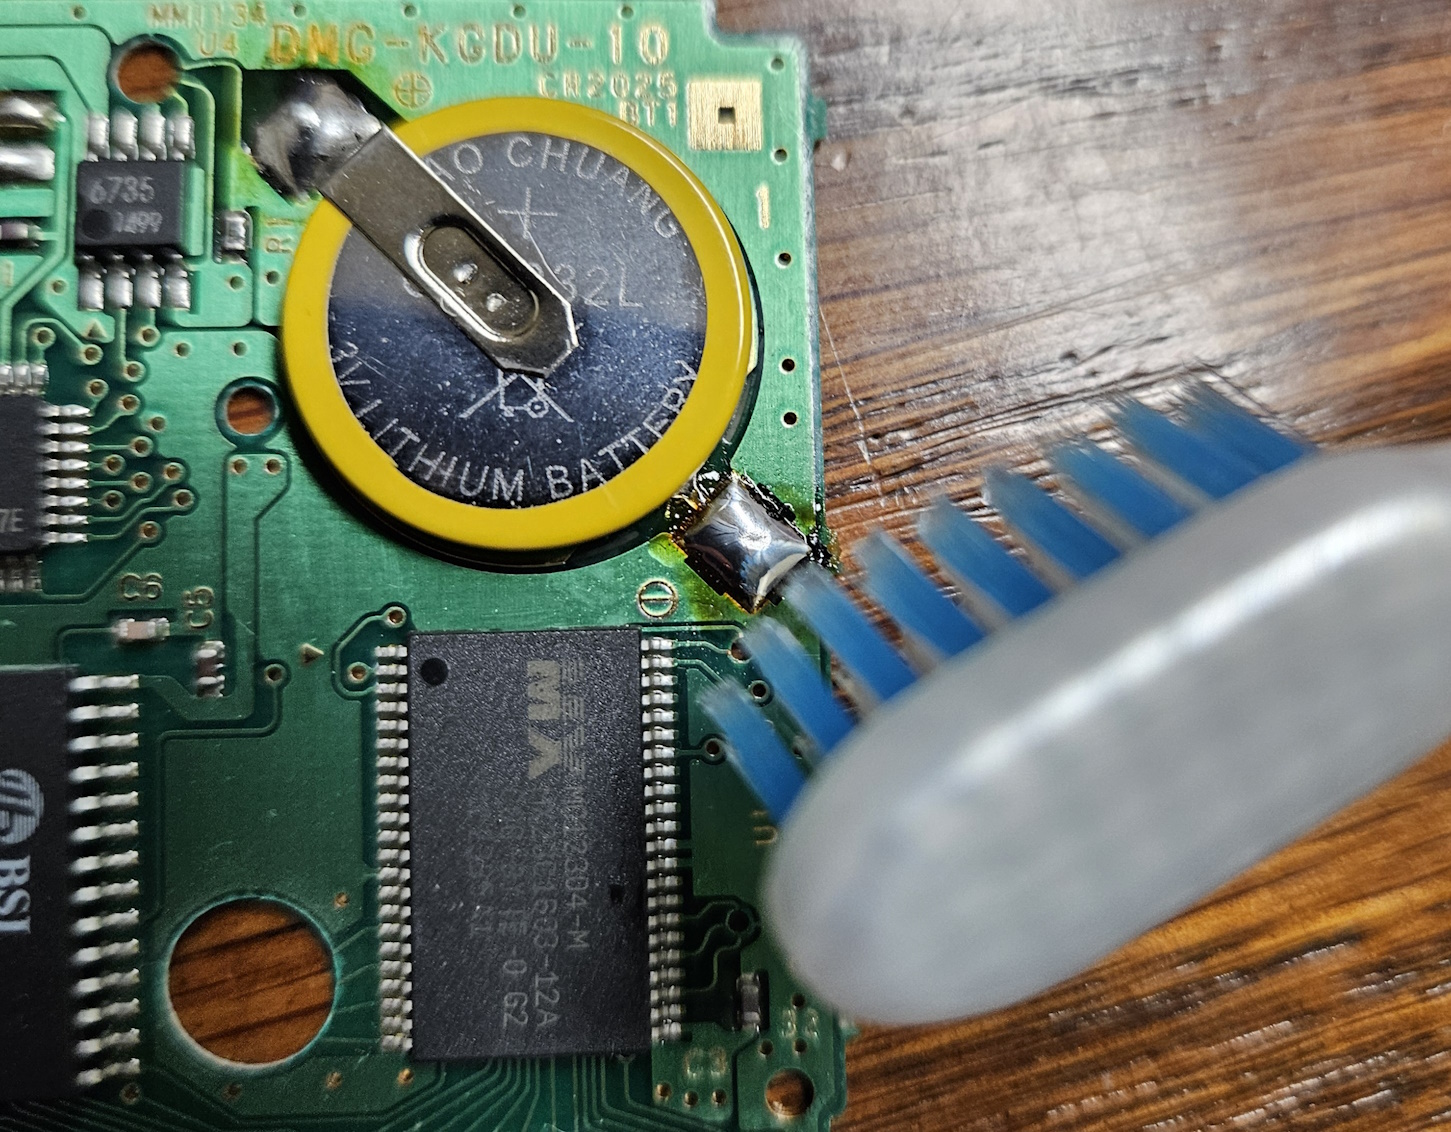
After I installed the new battery, I gently scrubbed the solder joints with a toothbrush soaked in rubbing alcohol so that I could clean up my flux (the brown, orangeish goo around the solder joints). I also cleaned the cartridge pins with an alcohol-soaked cotton swab while I was at it.
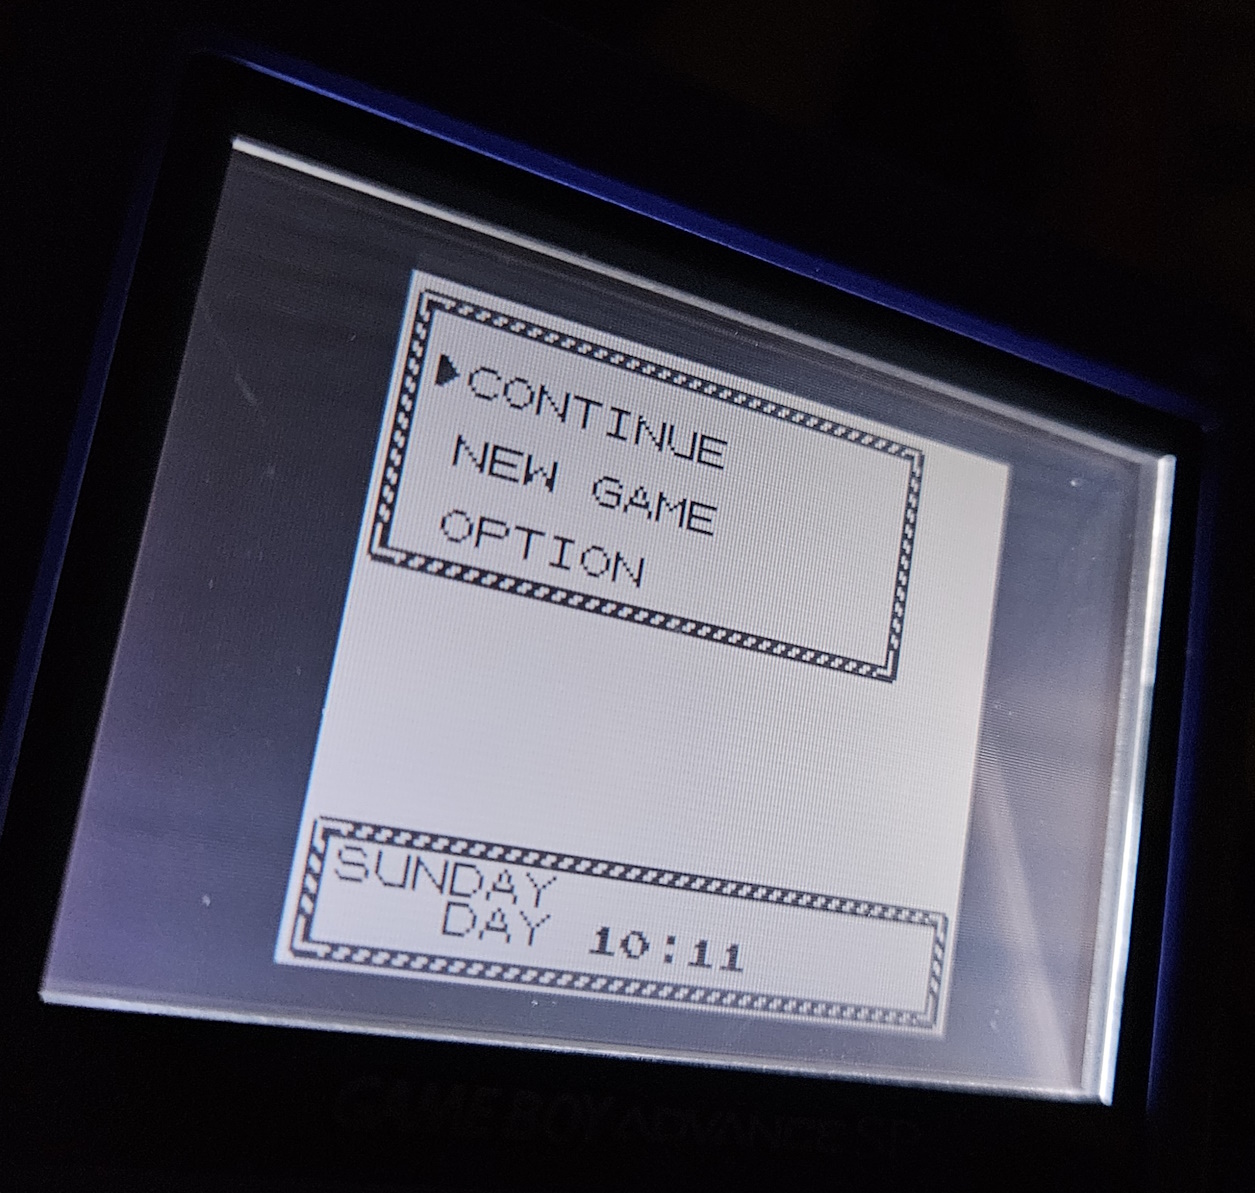
In order to test the new battery, I reassembled the game cartridge and popped it into my GBA. I started a new save, played for 5 or so minutes, then saved the game. I then turned off my GBA and removed the game cartridge for 30 seconds. The reason that I do this is because I want to see if the battery sustains my game save for a period of time after the cartridge has been removed from a source of power (the GBA). After the wait, I reinserted the cartridge and boot up the game. Sure enough, my save is still there (indicated by the option to continue), meaning that I have installed the battery correctly.
If it didn't save, then you might have installed the battery incorrectly. You can open it back up and invert the battery leads. If that doesn't work, the battery might not be making connection to the board. This can be tested with a multimeter by probing the solder joints or somewhere on the board which can be traced to the battery. The battery should be providing 3V. To help the connection you can apply completely fresh solder, but you want to ensure that the pads are cleaned with alcohol and is free of debris first.
I hope that this post is informative to anyone looking to fix their old game cartridges and to anyone who is interested in wielding the mighty soldering iron. If you have any questions, feel free to email me!